Daylight Camera Instructions
Please note that this is a DIY camera, not a commercial product. We have done our best to make the instructions easy to follow, but there are some fiddly steps and it may take some experimentation and tinkering to make things work.
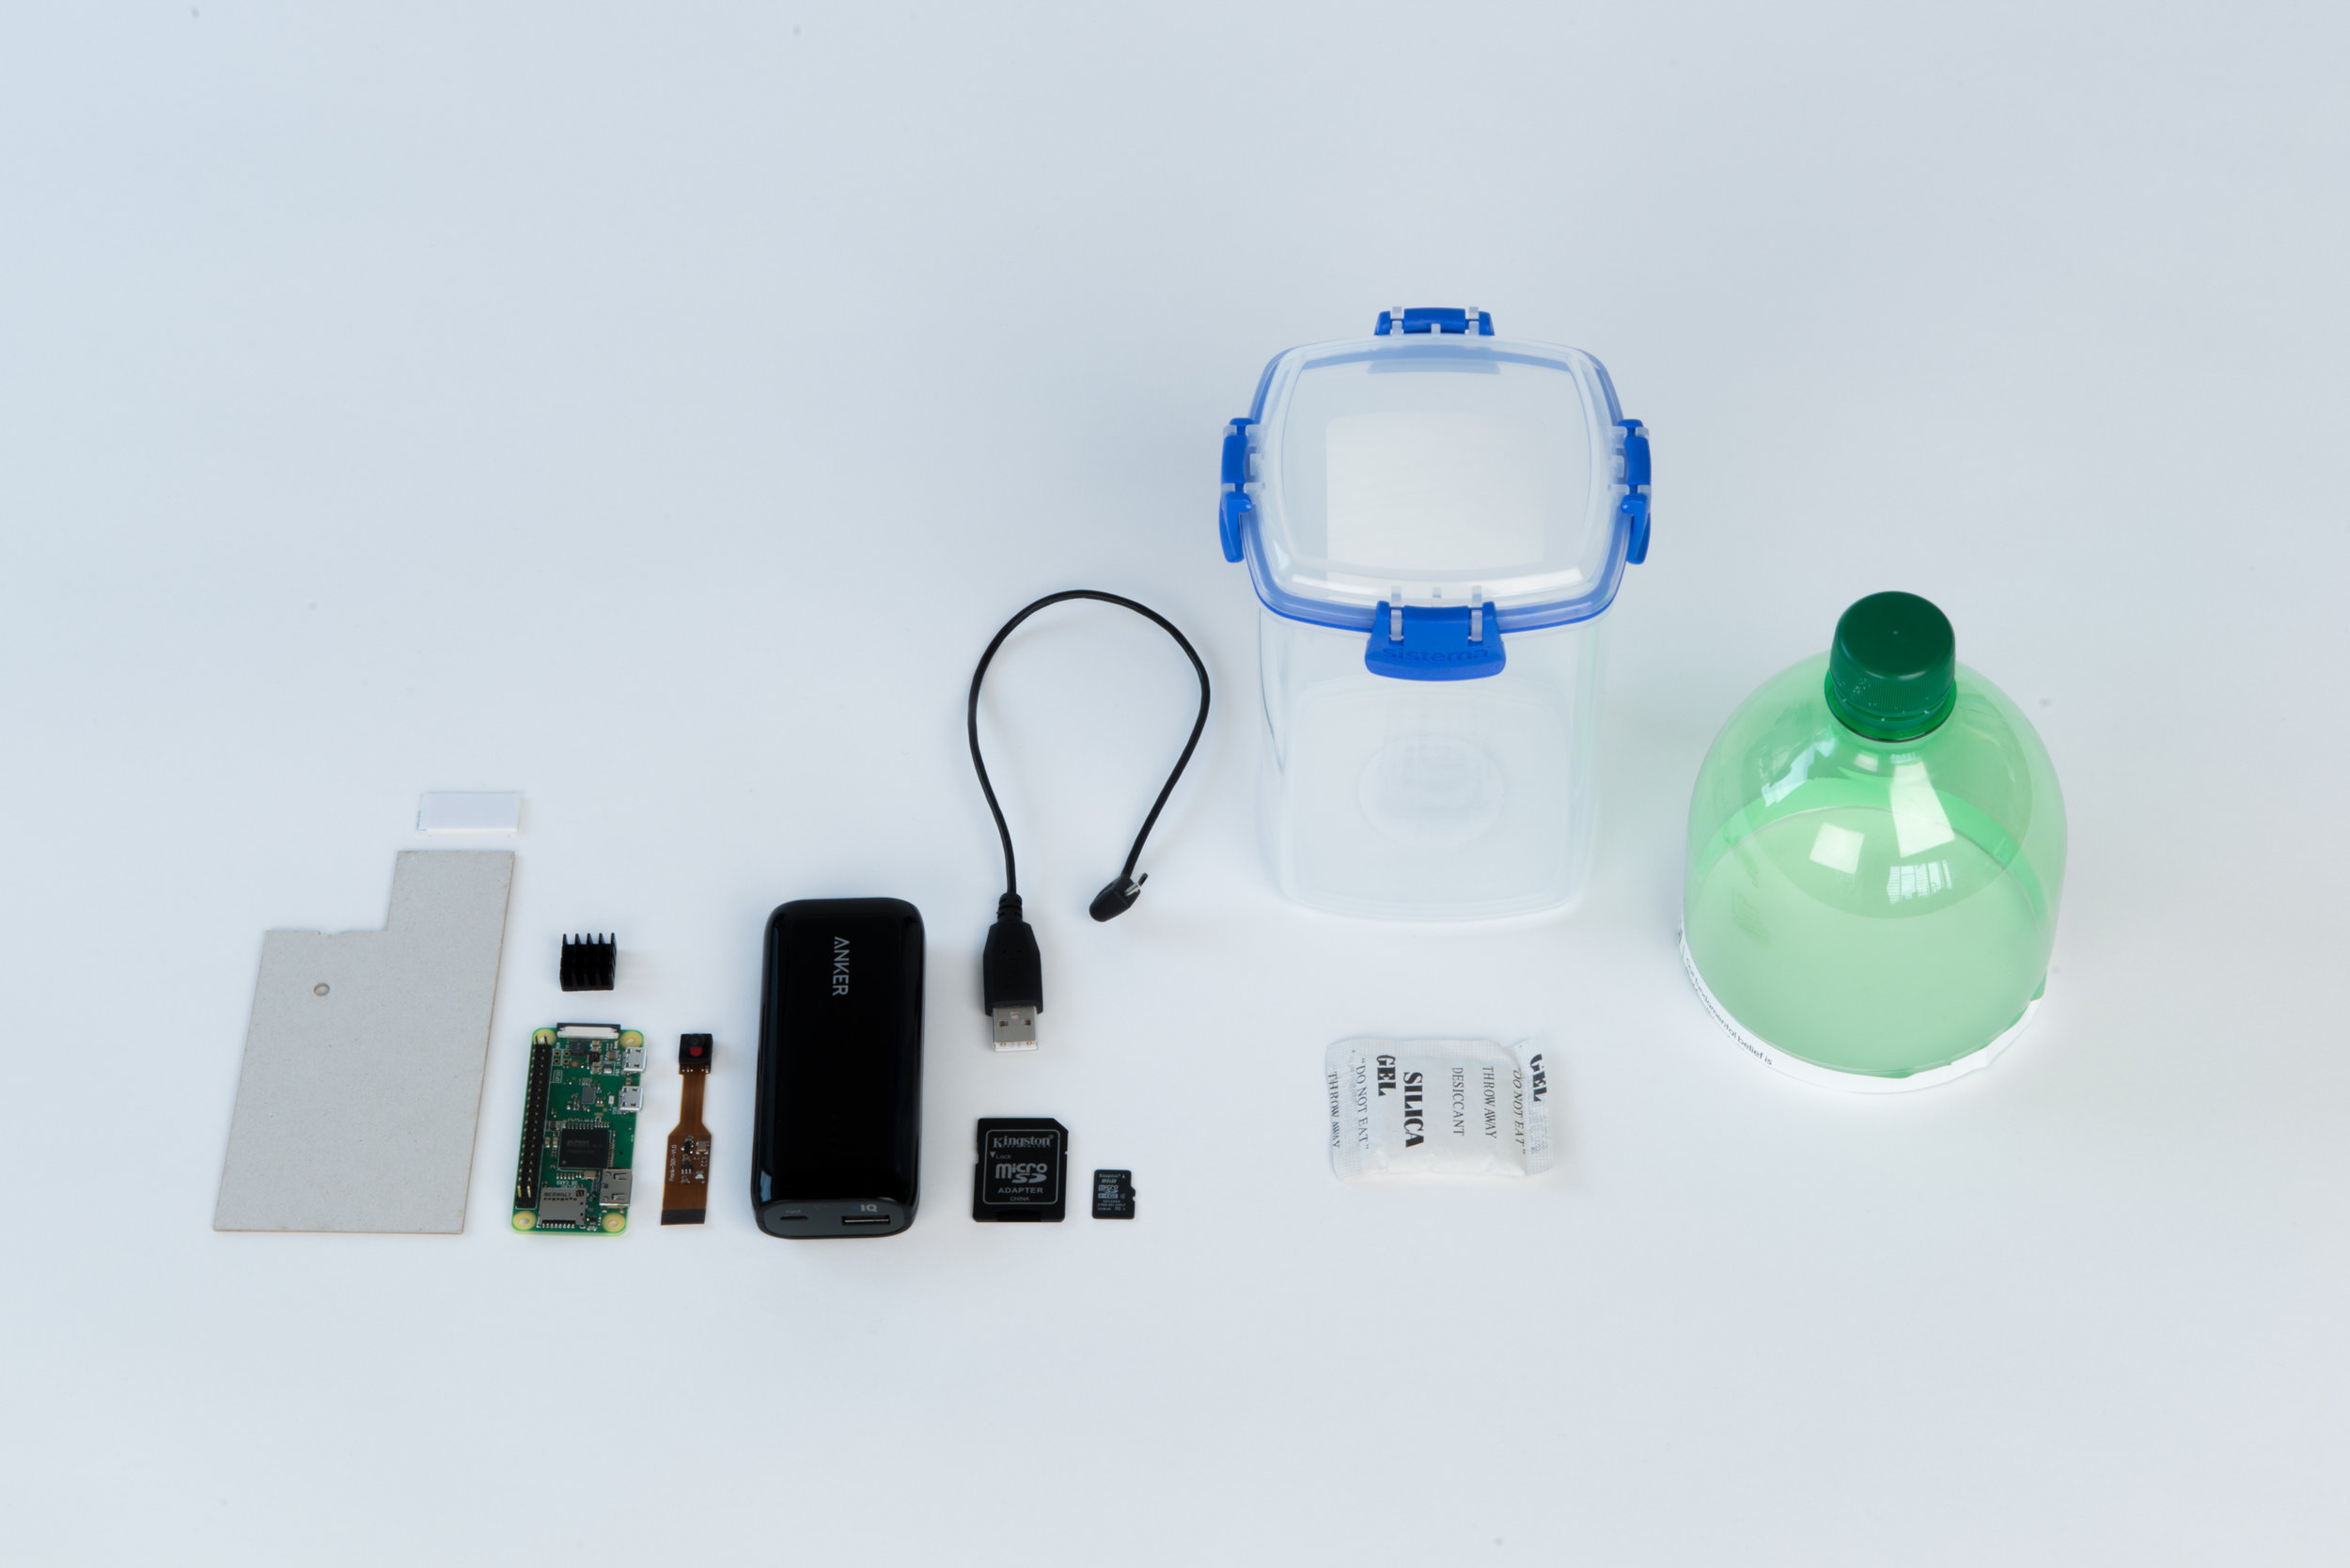
The parts you need to make the camera can be ordered from online retailers or bought in electronic hardware stores. Follow the links below to find out more about each part, some links lead to retailers but you may need to shop around to find the best deal for each part. Prices can vary considerably, but it should be possible to source a complete kit for around £35.
Alternatively, the retailer Pimoroni supplies a My Naturewatch Camera bundle containing most of the parts (except battery) needed to get up and running. Click here for details.
Note: the daylight camera requires no soldering!
Camera Parts
Raspberry Pi Zero W , Pi 3A+, Pi 3B+ or Pi 4B
USB power bank/battery** (ideally around 6000mAh in capacity for approximately 12 hours usage)
USB charger for charging the power bank
Micro USB cable
Useful Tools and Accessories
Computer with WIFI access
Smartphone or tablet (optional)
Cardboard
Large plastic drinks bottle for use as a lens shield
Masking tape
Sticky pads
Hot glue gun / Sugru / sealant
Silica gel pouches (optional)
Scissors
Drill
* Please Note: The My Naturewatch software does not currently support the newer Raspberry Pi Camera Module 3
** The cost of power banks vary enormously, so do shop around. In addition, the capacity of the battery depends on how long you wish to leave your camera running. Some users are happy with 2 or 3 hours of usage from a pound-shop battery, while others prefer that the battery lasts over a day - so finding the right balance may take some experimentation.
*** Please Note: Some retailers supply micro SD cards in bundles that have an operating system called NOOBS preinstalled. This is not the right software for the cameras, and will be deleted automatically when you install the My Naturewatch Camera software on them (steps 1 -5 below). We have also had reports of issues using SD cards with capacities of 64GB and greater, so we recommend sticking to the 16 -32GB range.
Overview
There are five stages to making a My Naturewatch Camera.
Download the Software. The camera software needs to be installed on the SD card from the Internet. The Raspberry Pi Zero will read the software from the SD card to become a My Naturewatch Camera.
Assemble the Electronics. Here you will attach the camera to the Pi Zero. It's a little fiddly, but with patience you'll manage.
Test Your Camera. Now you can power up the camera and see if it works.
Make the Camera Housing. Assuming you have a working camera, it's time to make a weather-resistant housing from household materials.
Assemble the Camera. Finally, you're ready to fix the camera inside the housing and try it out!
The whole process should only take 60 - 90 minutes.
Download the Software
Copy the camera software to a micro SD card (up to 1 hour). This software contains the operating system for the Pi Zero and an application that controls the camera. This bundled software is often referred to as a ‘disk image’.
Downloading the software and installing it on the SD card can take a while, depending on things like the speed of your internet and the computer you’re using. You can skip to Step 6 and continue working through the ‘Assembly’ and ‘Housing’ sections while you wait for actions in steps 1-5 to complete if you like.
1. Download the disk image
Download the disk image (a 1GB file that unzips to 3GB) from the following link (up to 1hour download depending on the speed of your connection):
https://github.com/interactionresearchstudio/NaturewatchCameraServer/releases/latest
You should download the ‘mynaturewatch-camera.img.gz’ in the assets section.
Note: the downloaded file will be a compressed ‘zip file’ and you will need to uncompress it. On a Mac, you simply need to double-click in the file for it to unzip. On Windows, we recommend using a free piece of software called 7-Zip.
2. Take note of the location
Take note of the location where the disk image is being saved on your computer.
3. Download Etcher
Download an application called ‘Etcher’. This will copy the disk image to the micro SD card safely and easily (note: Etcher refers to the process of copying the disk image as 'flashing the drive').
Note: the current version of the software only works with Etcher, rather than comparable software alternatives.
4. Insert the Micro SD card
Insert the Micro SD card into your computer - using a micro SD adaptor* (your laptop may have a built-in SD card reader), or an external micro SD reader
5. Flash the Image
Using ‘Etcher’ software - select the disk image as ‘Image’ and the micro SD card as ‘Drive’, then press ‘Flash’. This step takes around 15 minutes. (Helpful Tip: the time can be shortened by deselecting "Validate write on success" in the Etchers settings menu, found by clicking the cog on the top right of the app)
Note: After Etcher has 'flashed the drive', Windows based computers will sometimes ask if you would like to format the SD card. If this happens, click 'no', otherwise the software will be deleted.
* When using a micro SD adaptor, be sure that the copy protection switch is unlocked.
Assemble the Electronics
6. Charge your Power Bank
Make sure your USB Power Bank is fully charged by plugging it into the mains via its cable and plug. Most batteries have LED lights to indicate level of charge
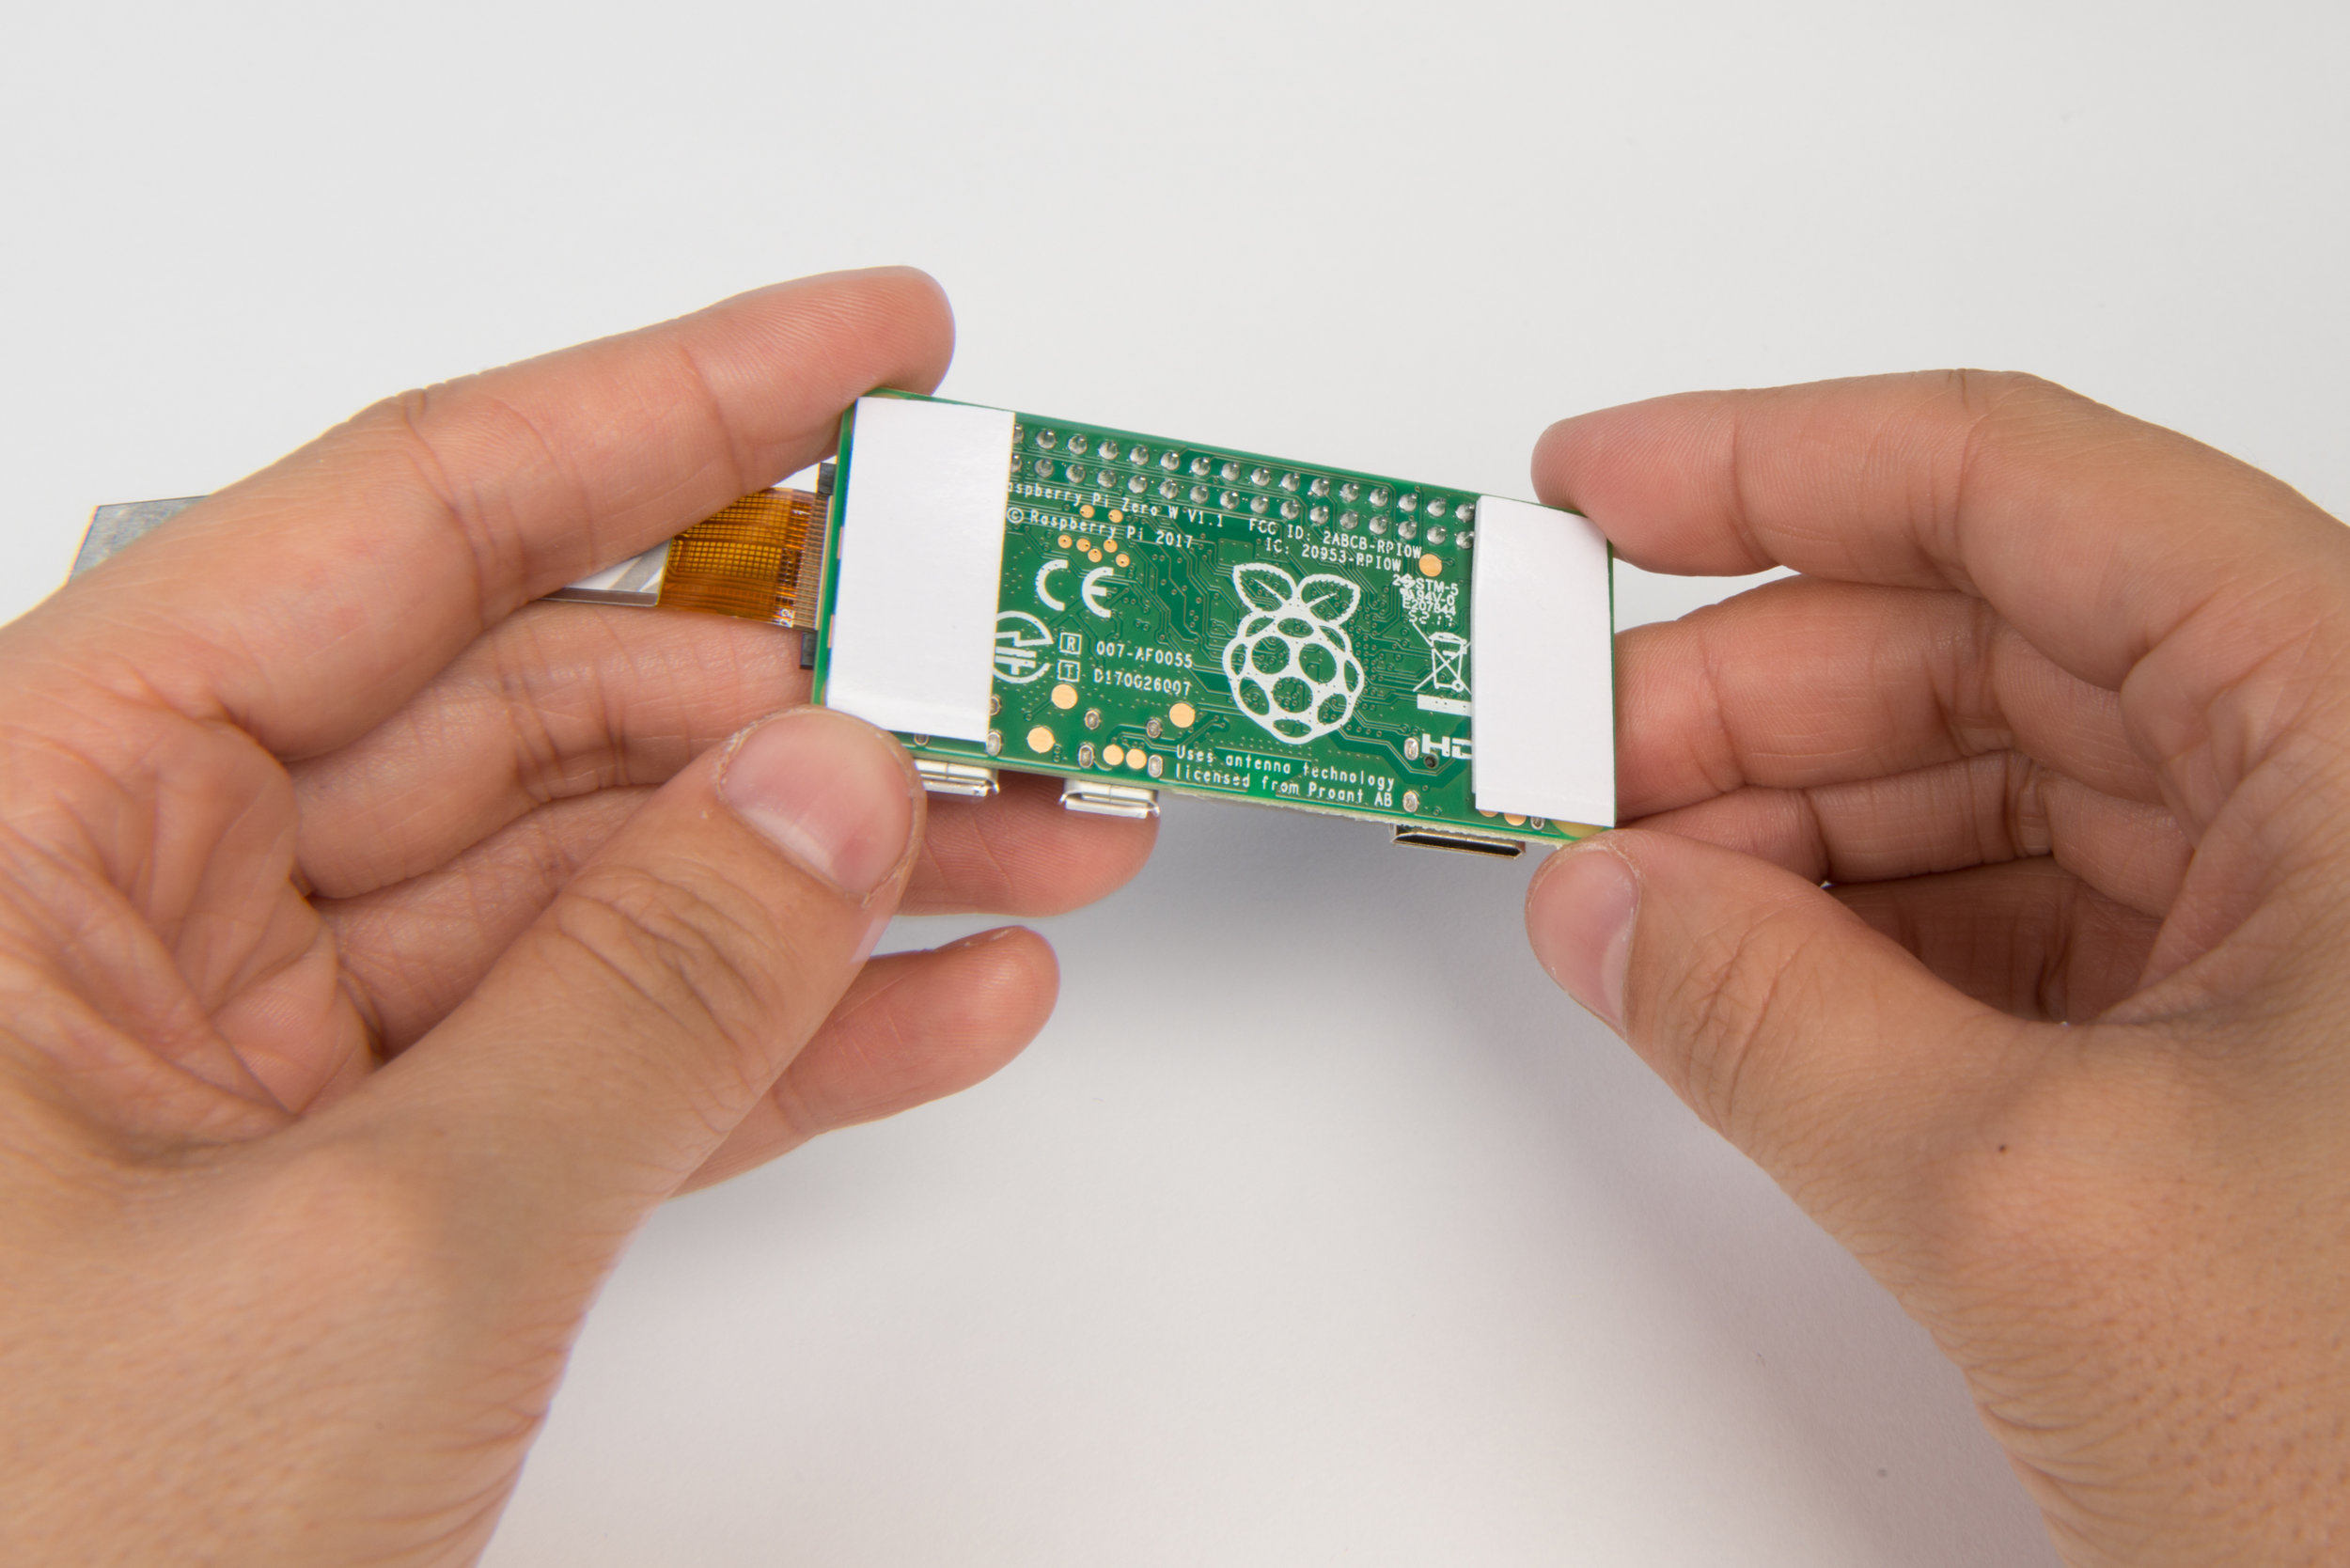
7. Attach the camera module to the Pi
The camera connector is very fragile, so take care on this step!
To attach the camera module to the Pi Zero: unclip the black locking strip away on the white camera connector on on the Pi Zero - it should move outwards by 1mm and feel loose. Now insert the camera module ribbon under the black strip and into the white connector - the metal side of the camera ribbon should face toward the green board. Secure the ribbon by re-clipping the black strip towards the white connector.
If the connector breaks, you can hold still use hot glue or tape (not superglue) to hold the cable in place – but its best to be gentle and patient to avoid breakage.
8. Attach a heatsink
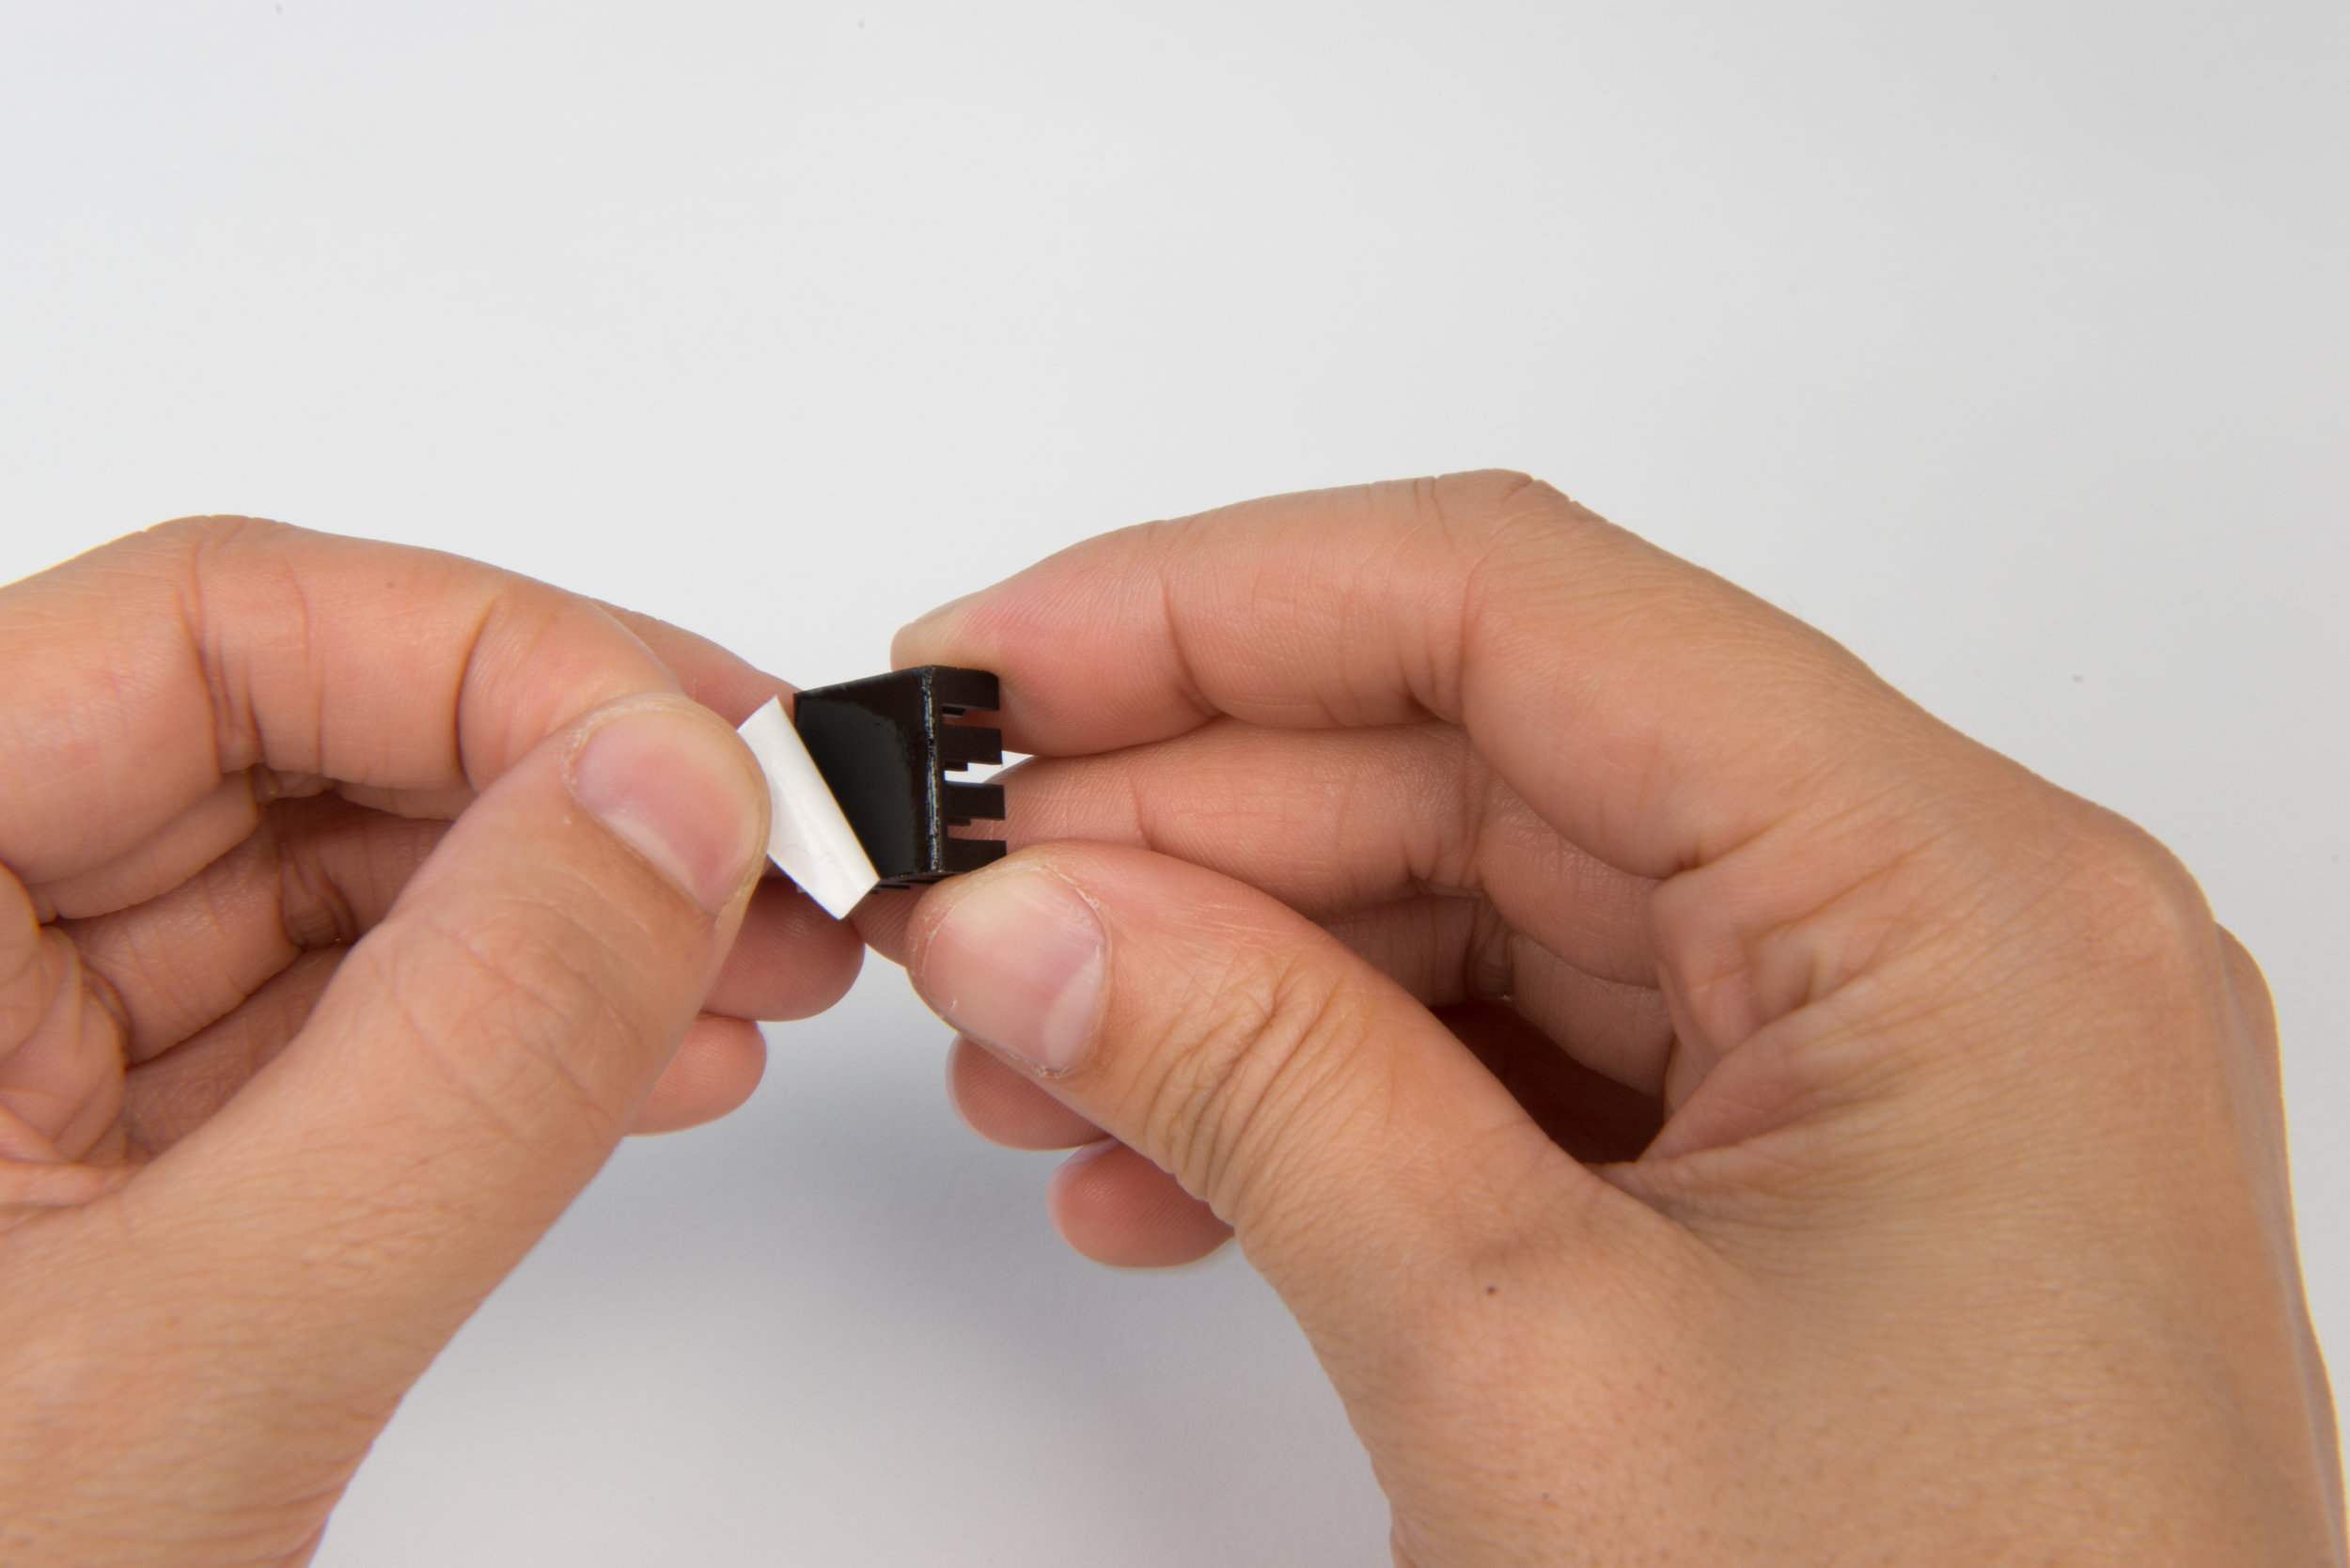
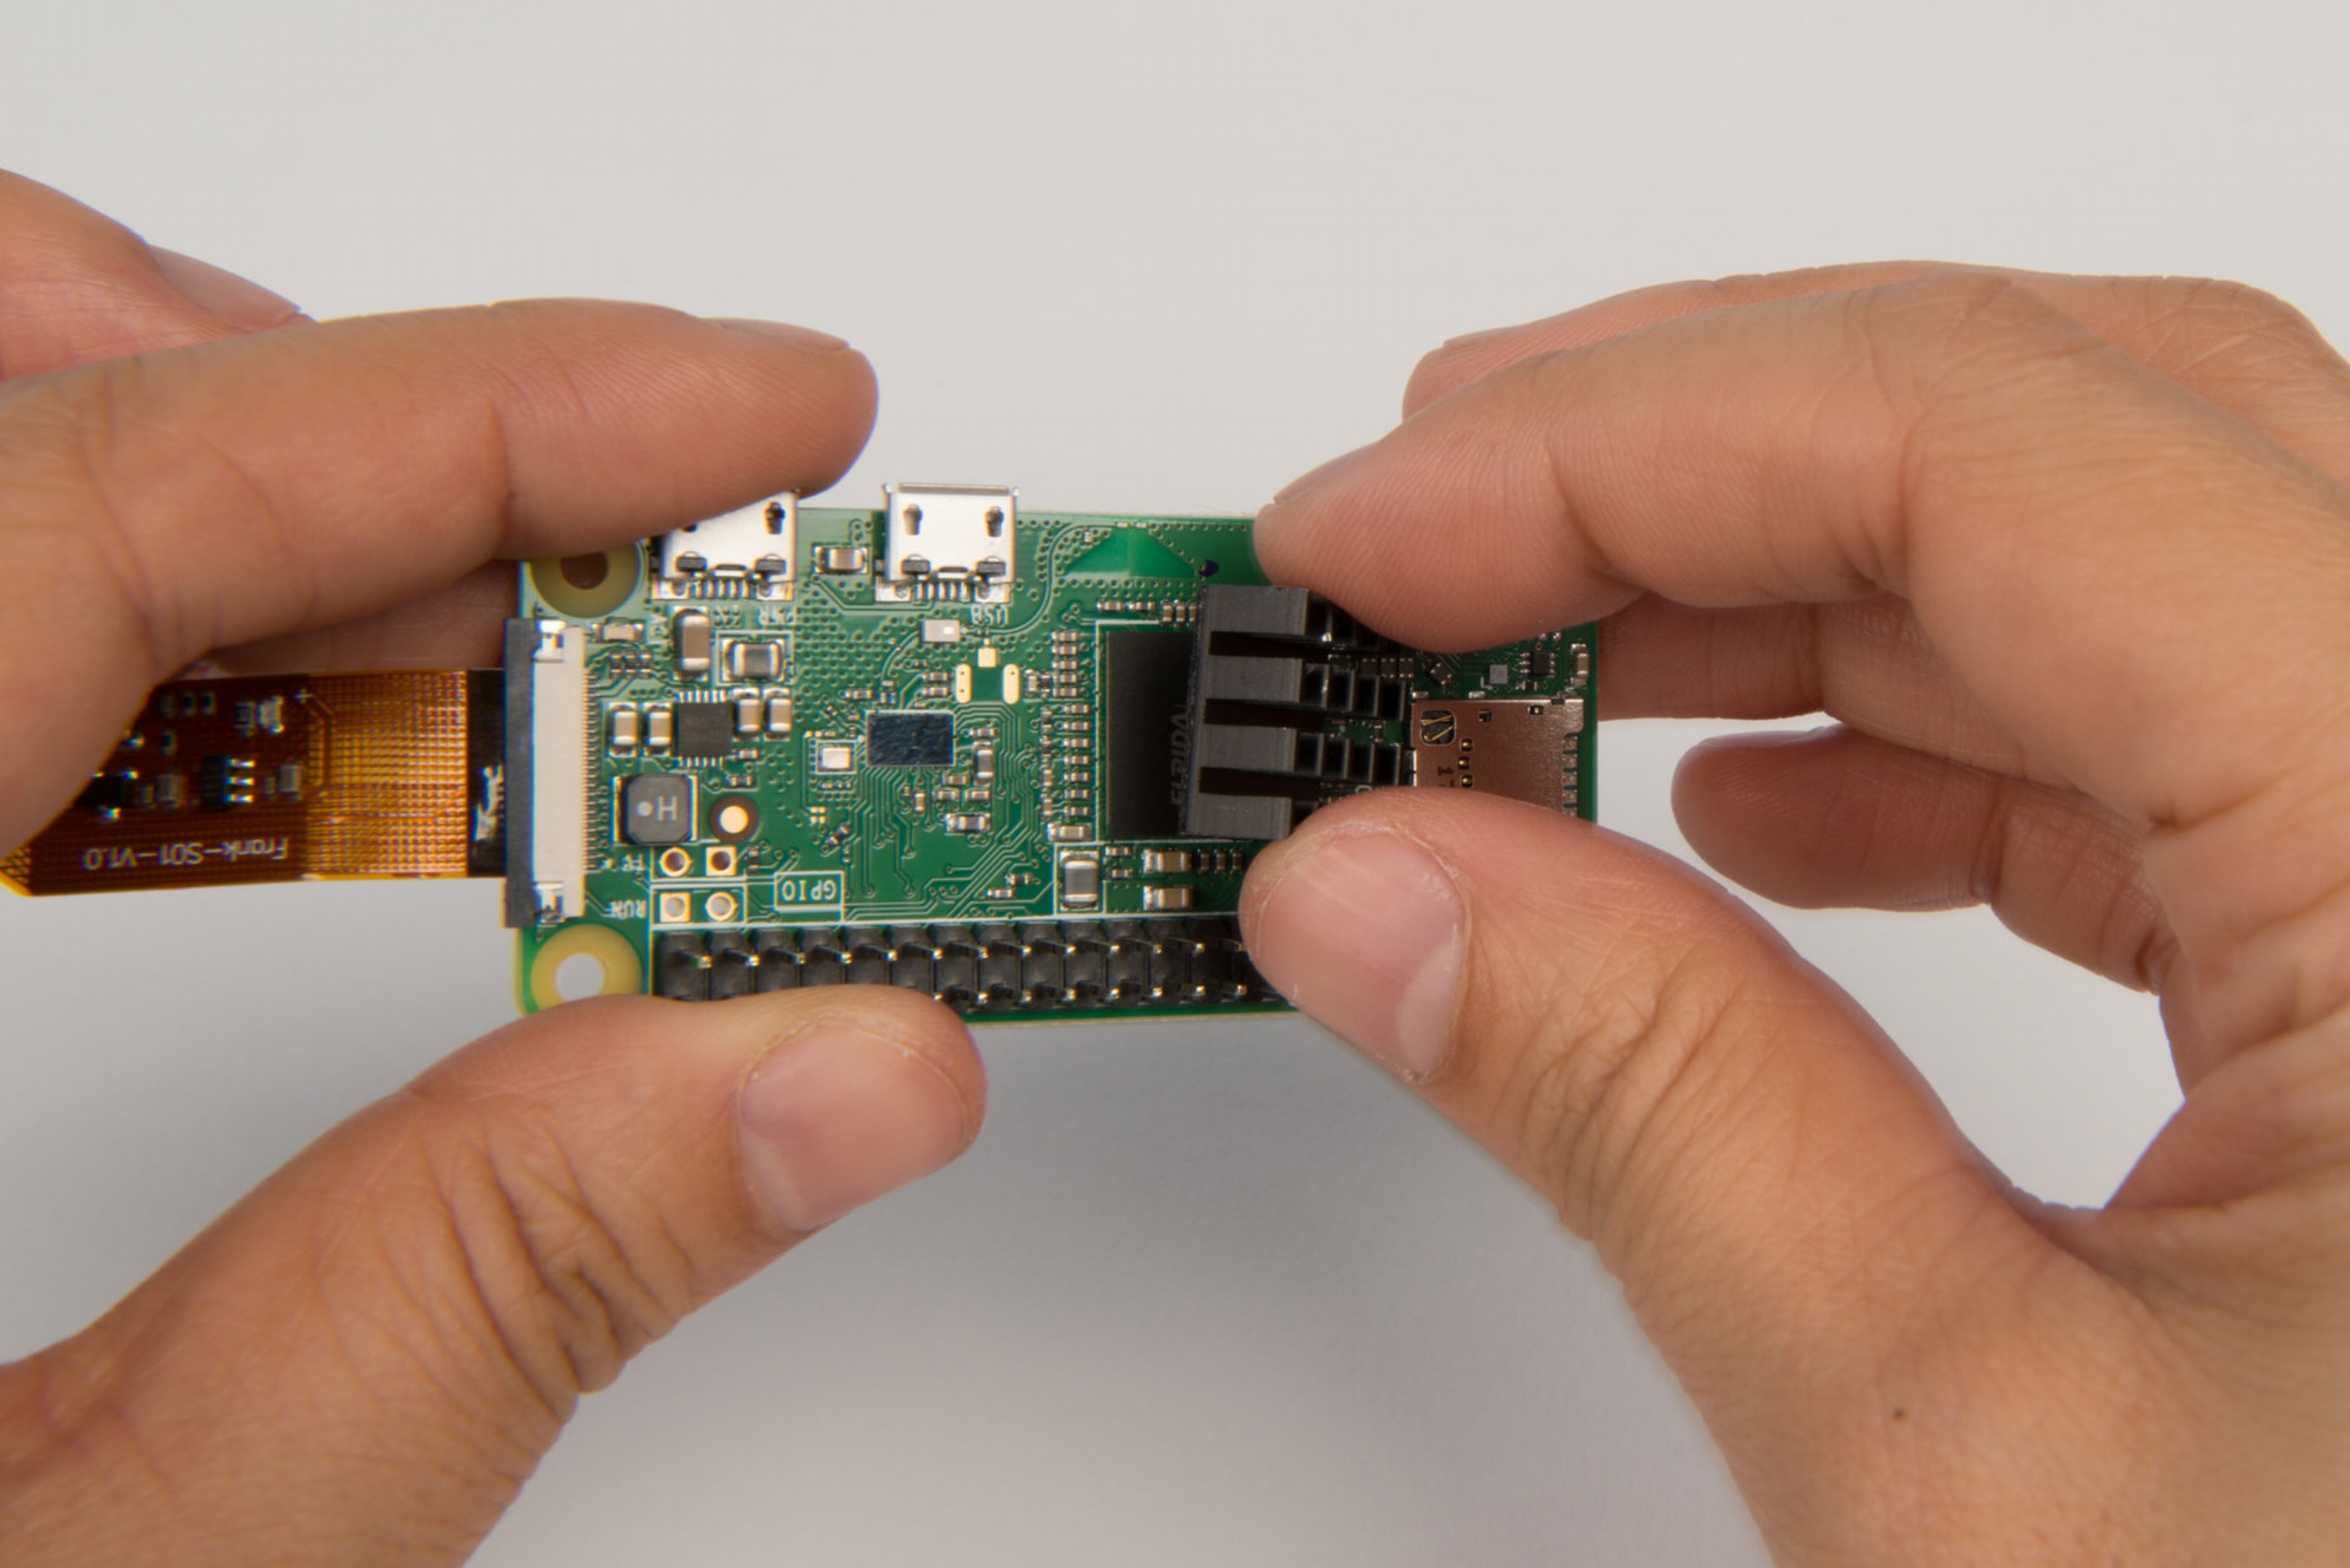
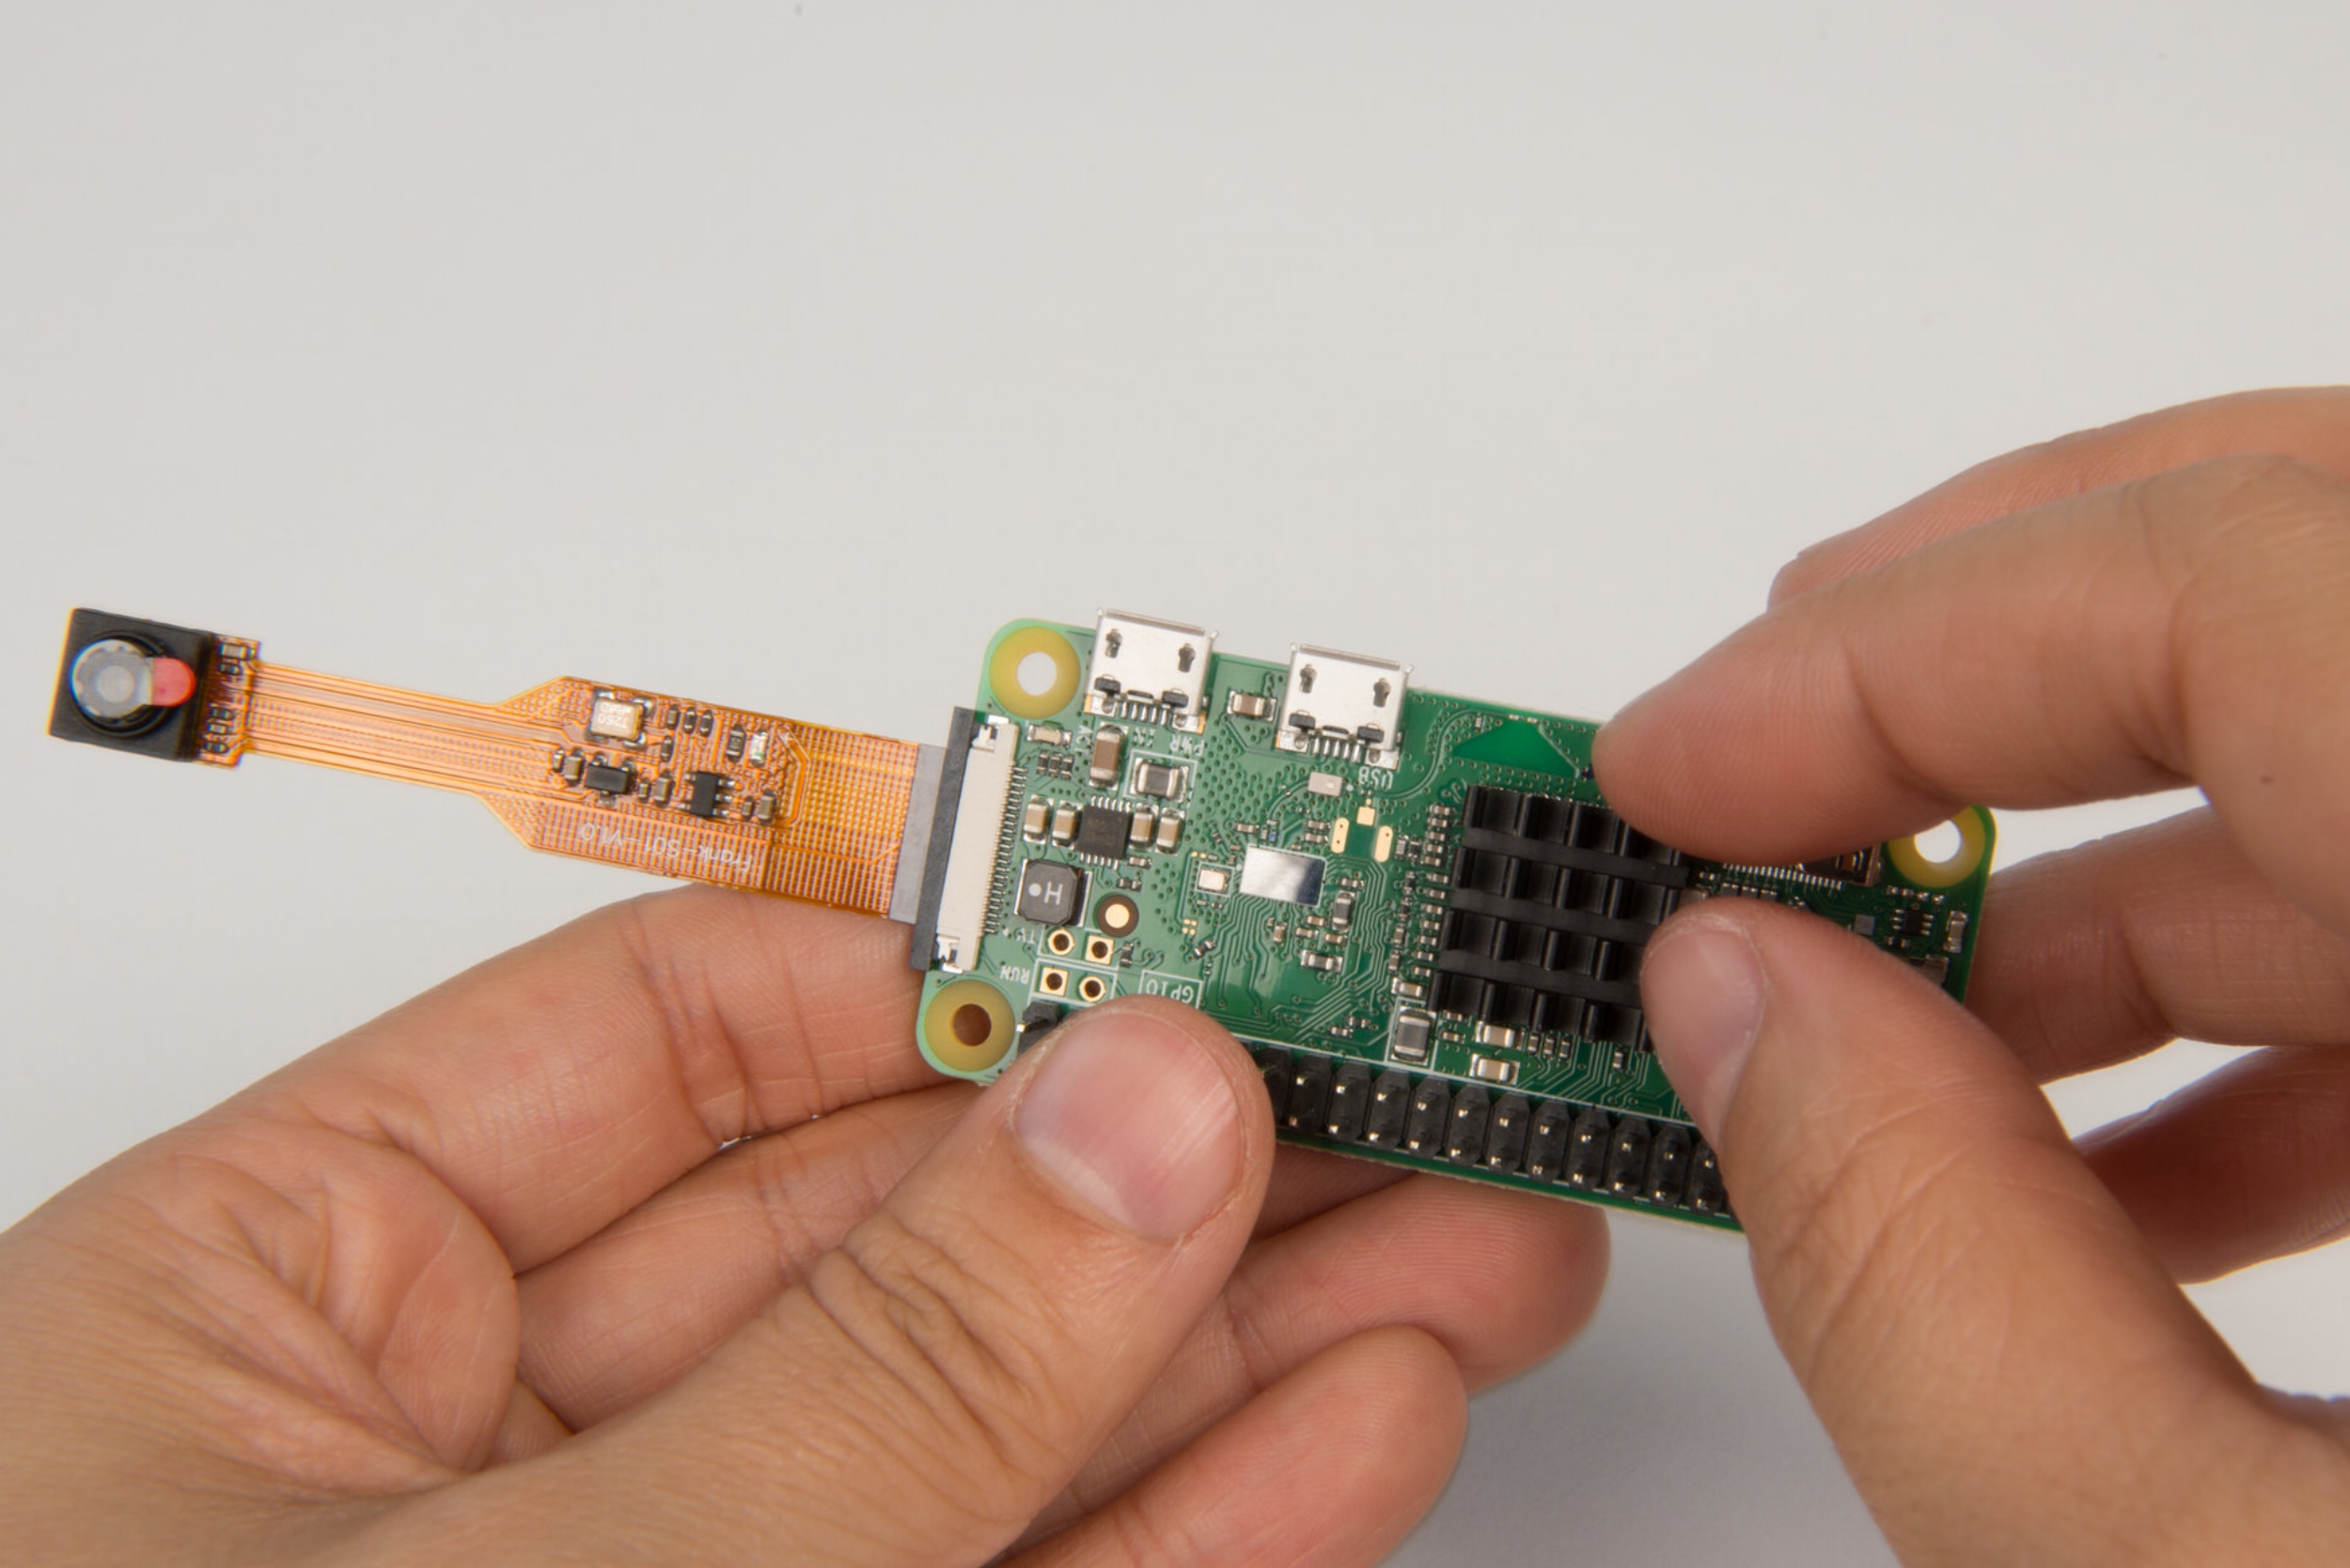
In order to dissipate heat from the processor it is necessary to attach a heatsink. Raspberry Pi heatsinks generally have self-adhesive tape already applied. Peel away the protective layer of the tape and carefully stick the heatsink squarely over the large black chip on the Pi Zero.
In a previous version of these instructions we suggested supergluing a bolt to the processor as a cheap alternative to a commercial heatsink, we have now changed this advice because we found that thermal performance varied considerably depending on the material of the bolt and users reported mixed results.
9. Stick your camera onto a piece of cardboard
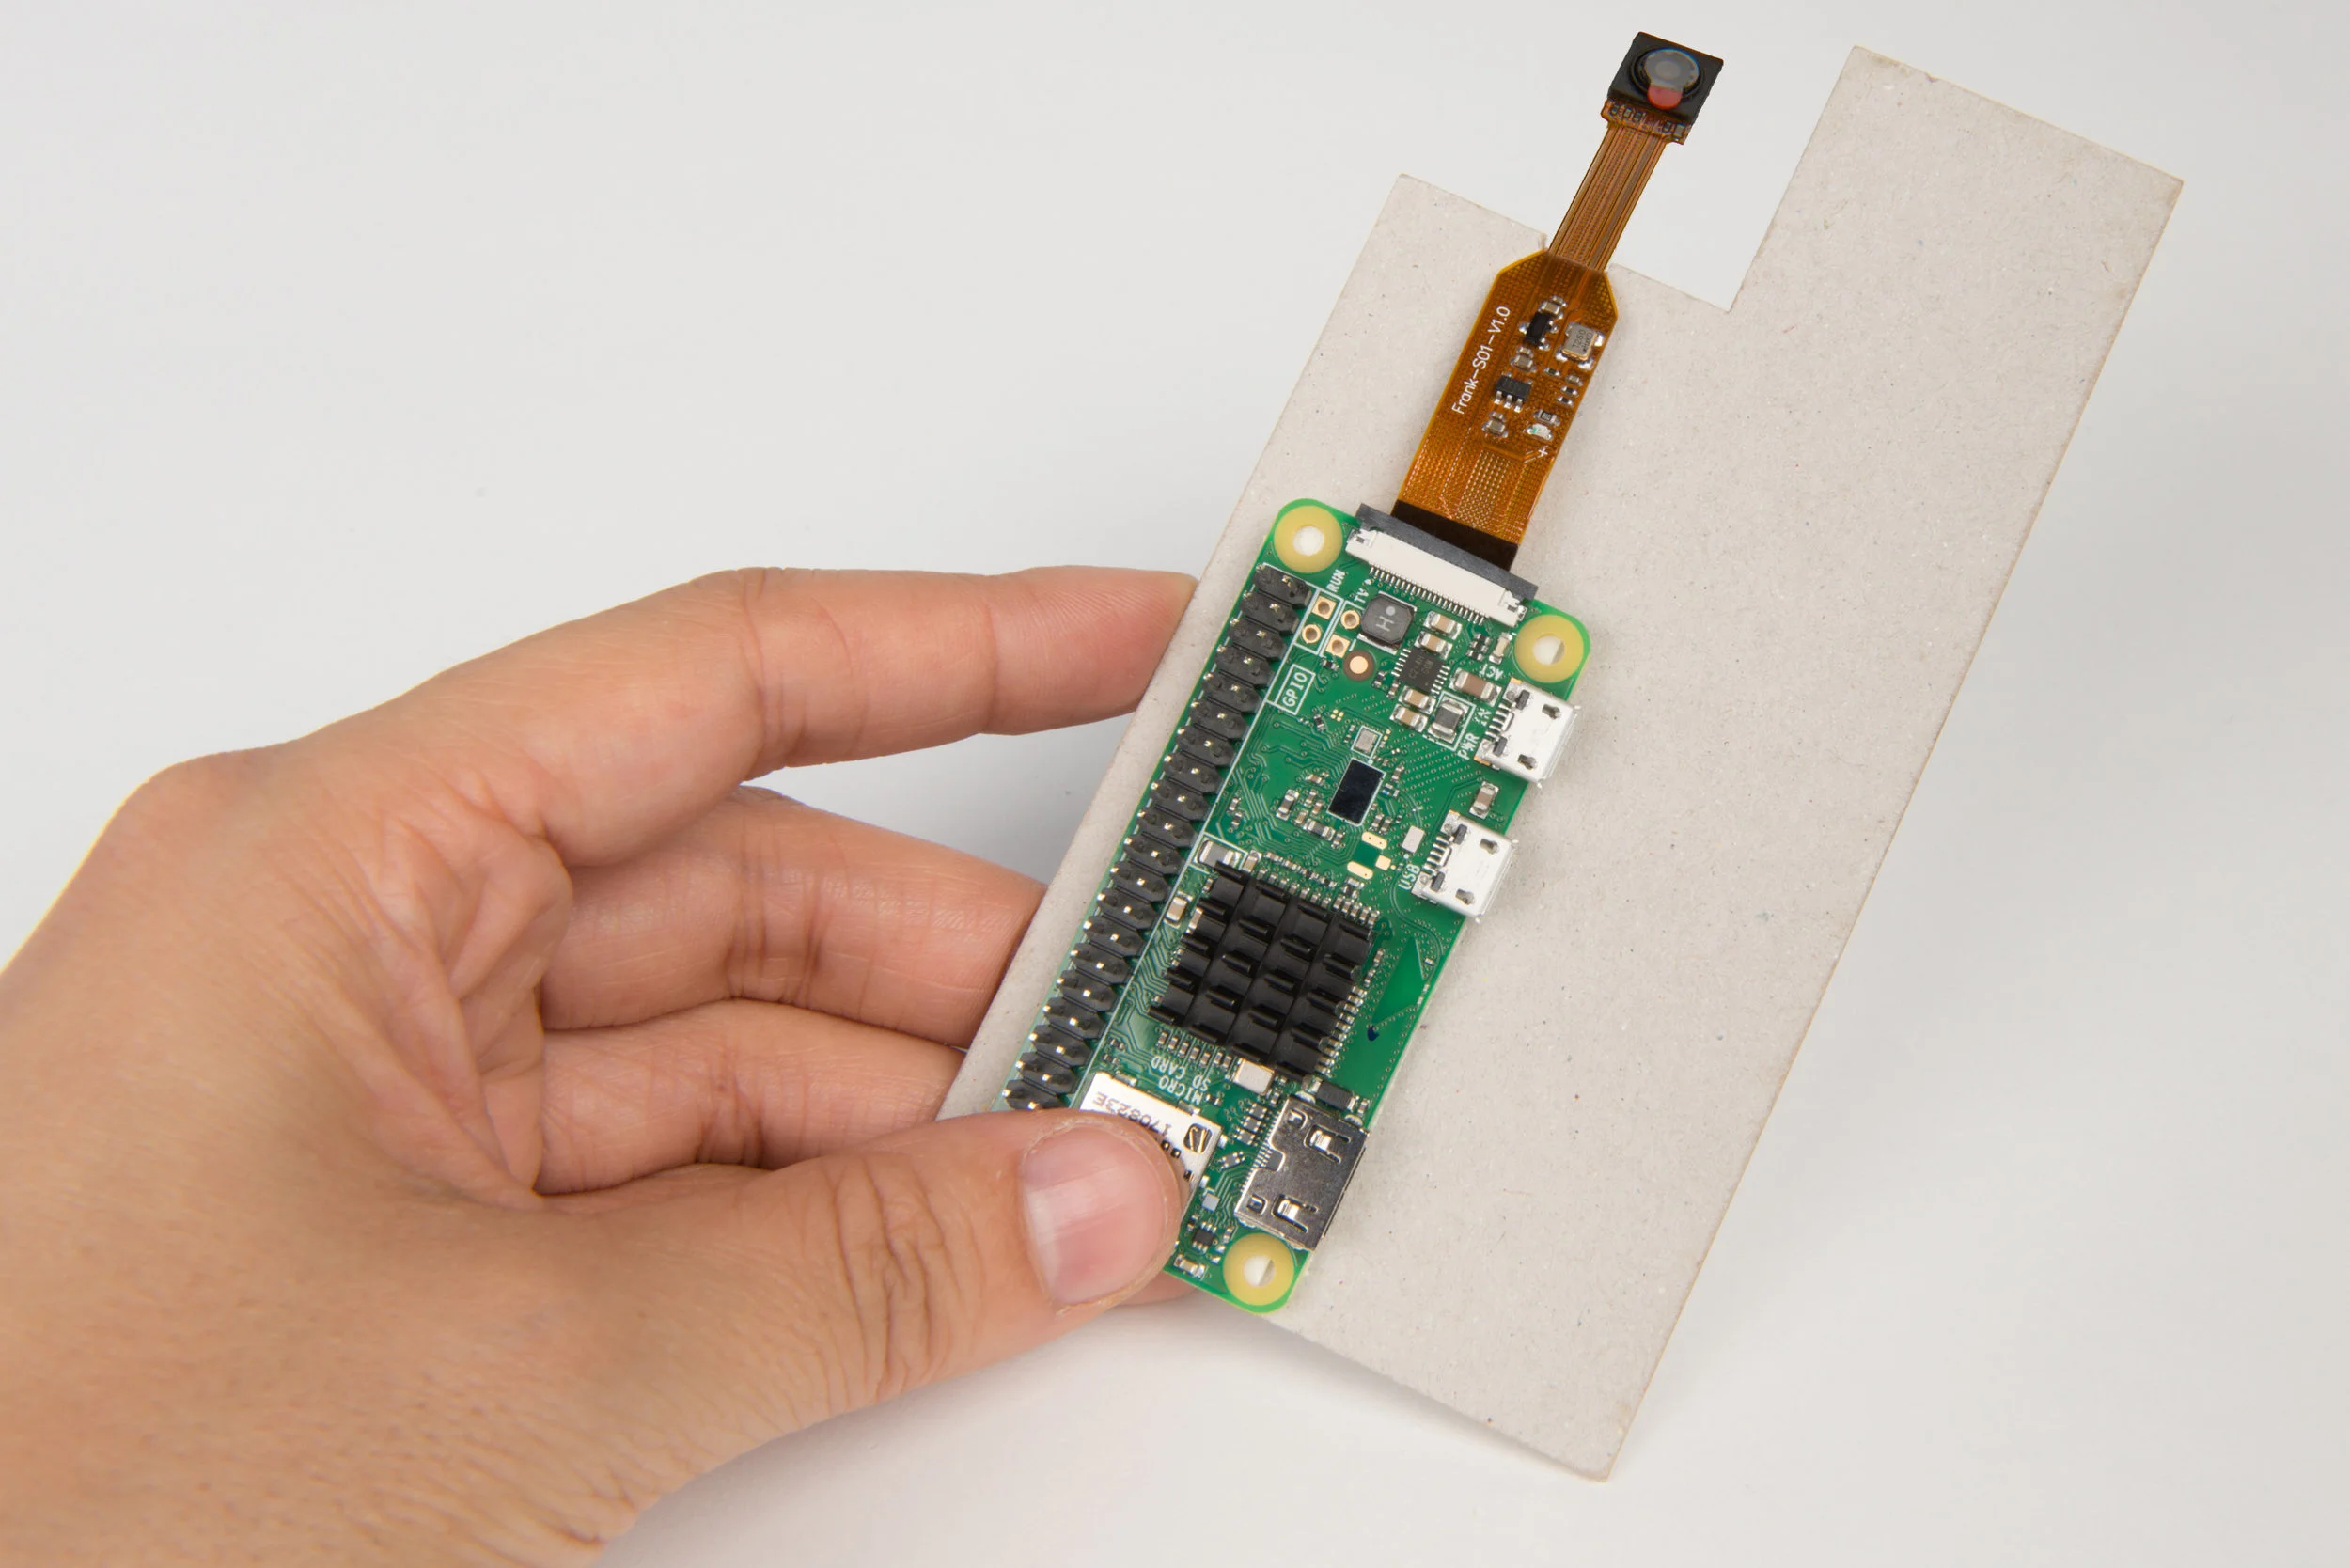
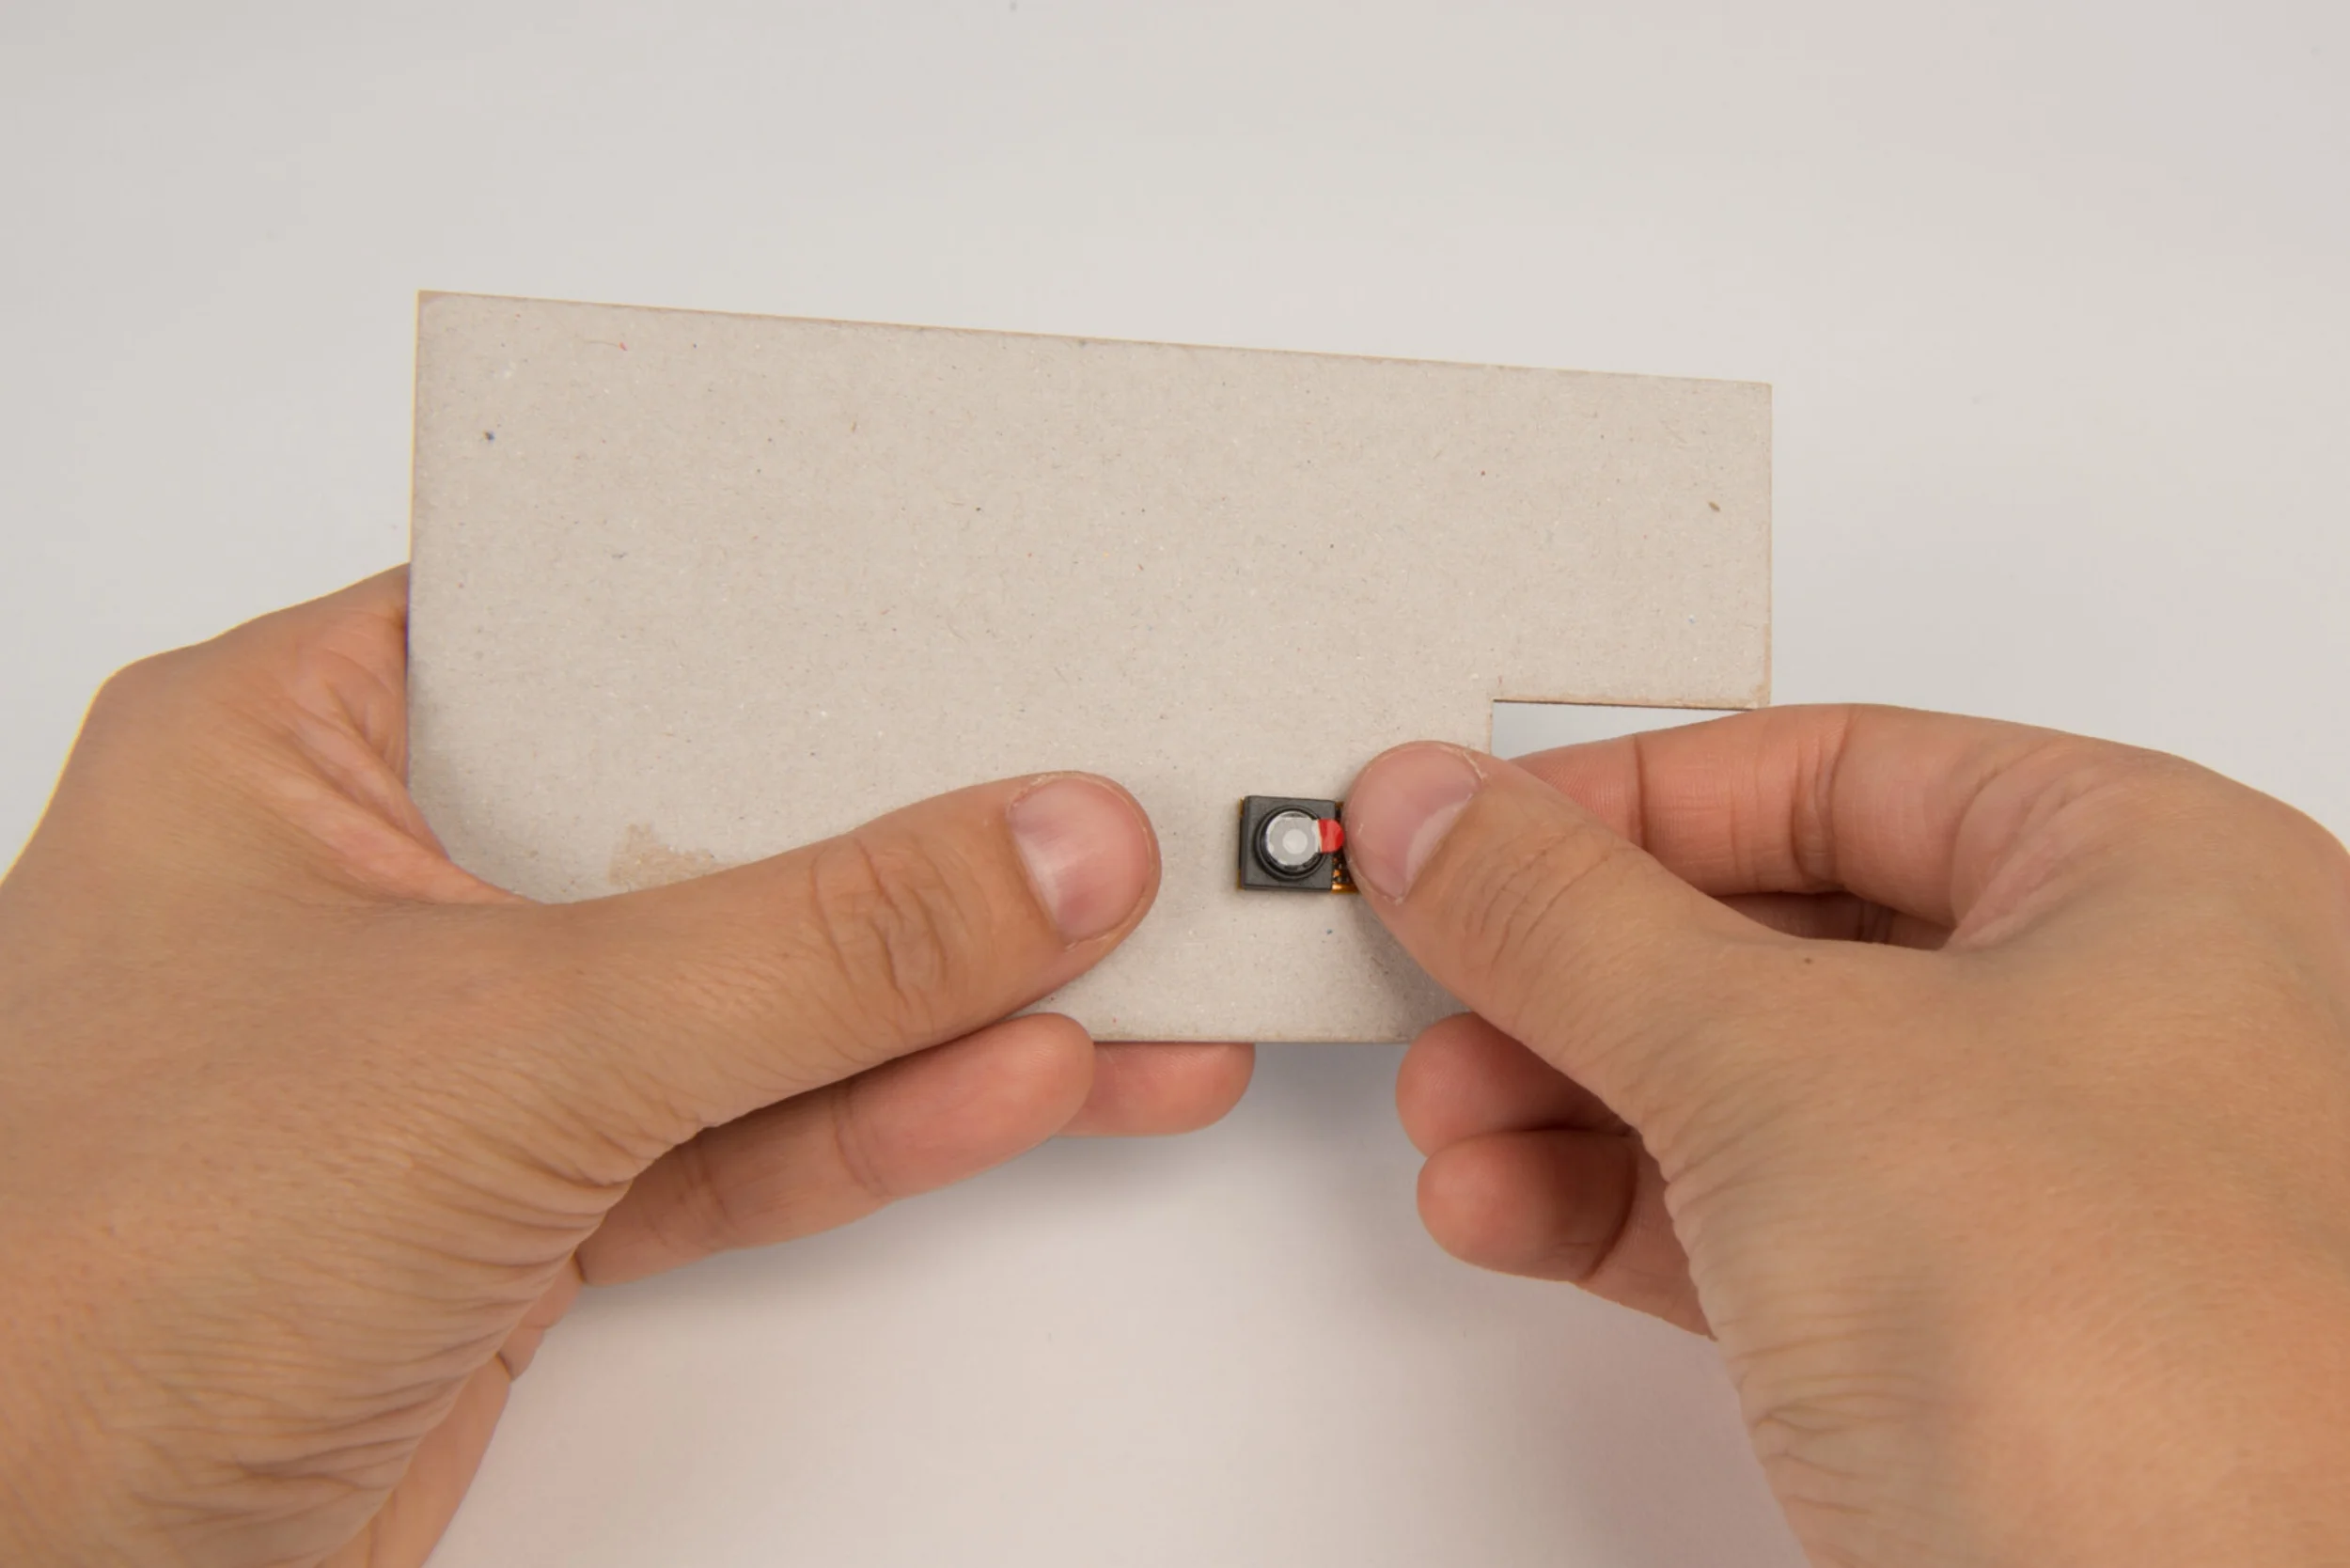
The ribbon cable of the camera can easily detach from the PI Zero. We recommend mounting the camera and Pi Zero to a piece of card to protect the connection.
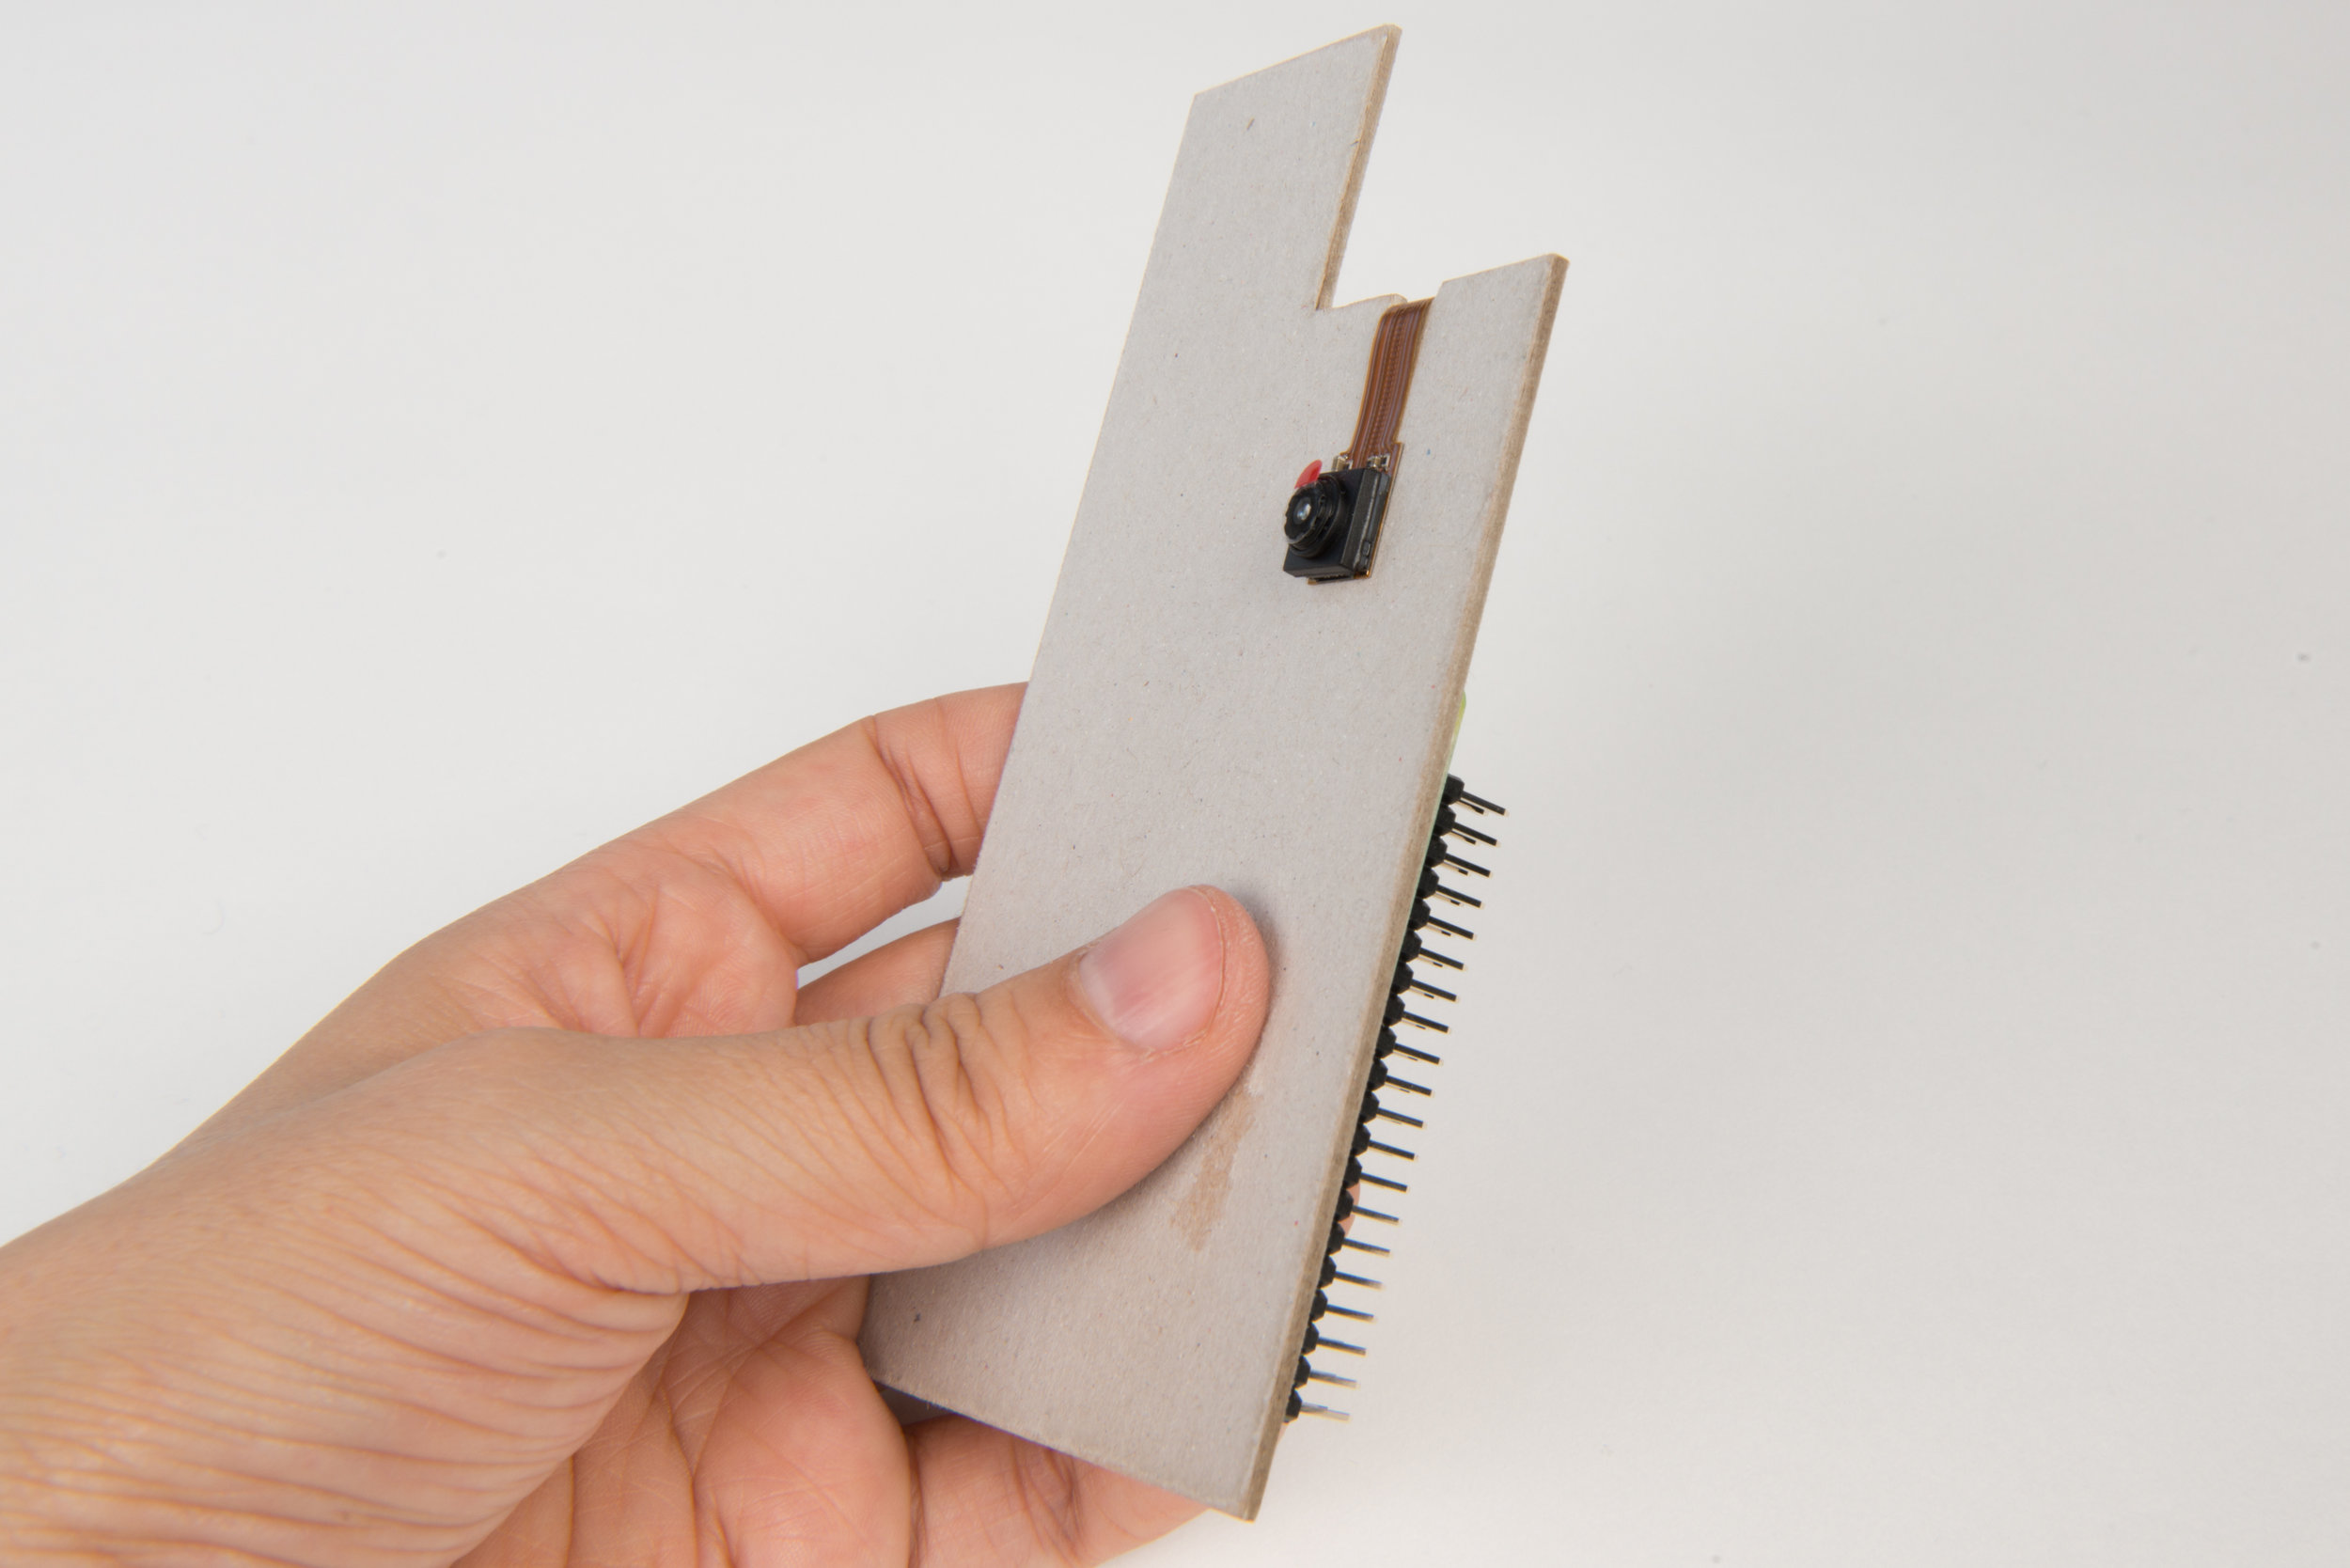
Use a stiff piece of card appropriate in size to the container you plan to house the camera. Click here for a printable outline drawing of the card used is these images, this shape is optimised for use with the Sistema Kip It 900ml cracker box. In this version, the camera and Pi Zero are mounted on opposite sides of the card.
Use double-sided sticky pads to mount the Raspberry Pi to the card, here we have mounted it offset to the centre to allow space for the USB power lead.
Carefully fold the camera cable ribbon cable at its narrowest point around the top of the card, remove the protective layer of the sticky tape that is factory mounted on the back of the camera, and stick to the other side on the card. A small piece of masking tape can also be used to secure the camera ribbon.
Tip: If you plan to use a large container, the Raspberry Pi and camera can all be mounted to one side of a piece of card.
Test Your Camera
10. Insert the micro SD card
Insert the micro SD card into the silver socket on the Pi Zero - the metal contacts on the SD Card should face toward the green board.
11. Power Up
Power the assembled unit by connecting the USB power bank to the Pi Zero. The small end of the USB cable plugs into the ‘PWR’ port on the end of the Pi Zero closest to the camera. The large end of USB cable plugs into the USB battery (or any USB power source).
12. Check the light
Allow 60 seconds for the Pi Zero to boot up. The green light on the Pi Zero will flicker to indicate processing. Once the system has started, a red LED on the camera ribbon cable will light. If the red LED does not light, it is likely that the camera ribbon cable is not correctly seated in the Pi Zero and so repeat the previous step ‘Attach the camera module to the Pi’.
13. Connect to the wireless network
On a smartphone, tablet or computer connect to the camera's wireless network. The wifi network name with either be 'MyNaturewatch-123456' the number at the end being always unique, but consistent (as the number is generated from the Pi's serial number). The wifi password is 'badgersandfoxes'.
For advanced users, there is an option of connecting your camera to your home network. Instructions are here.
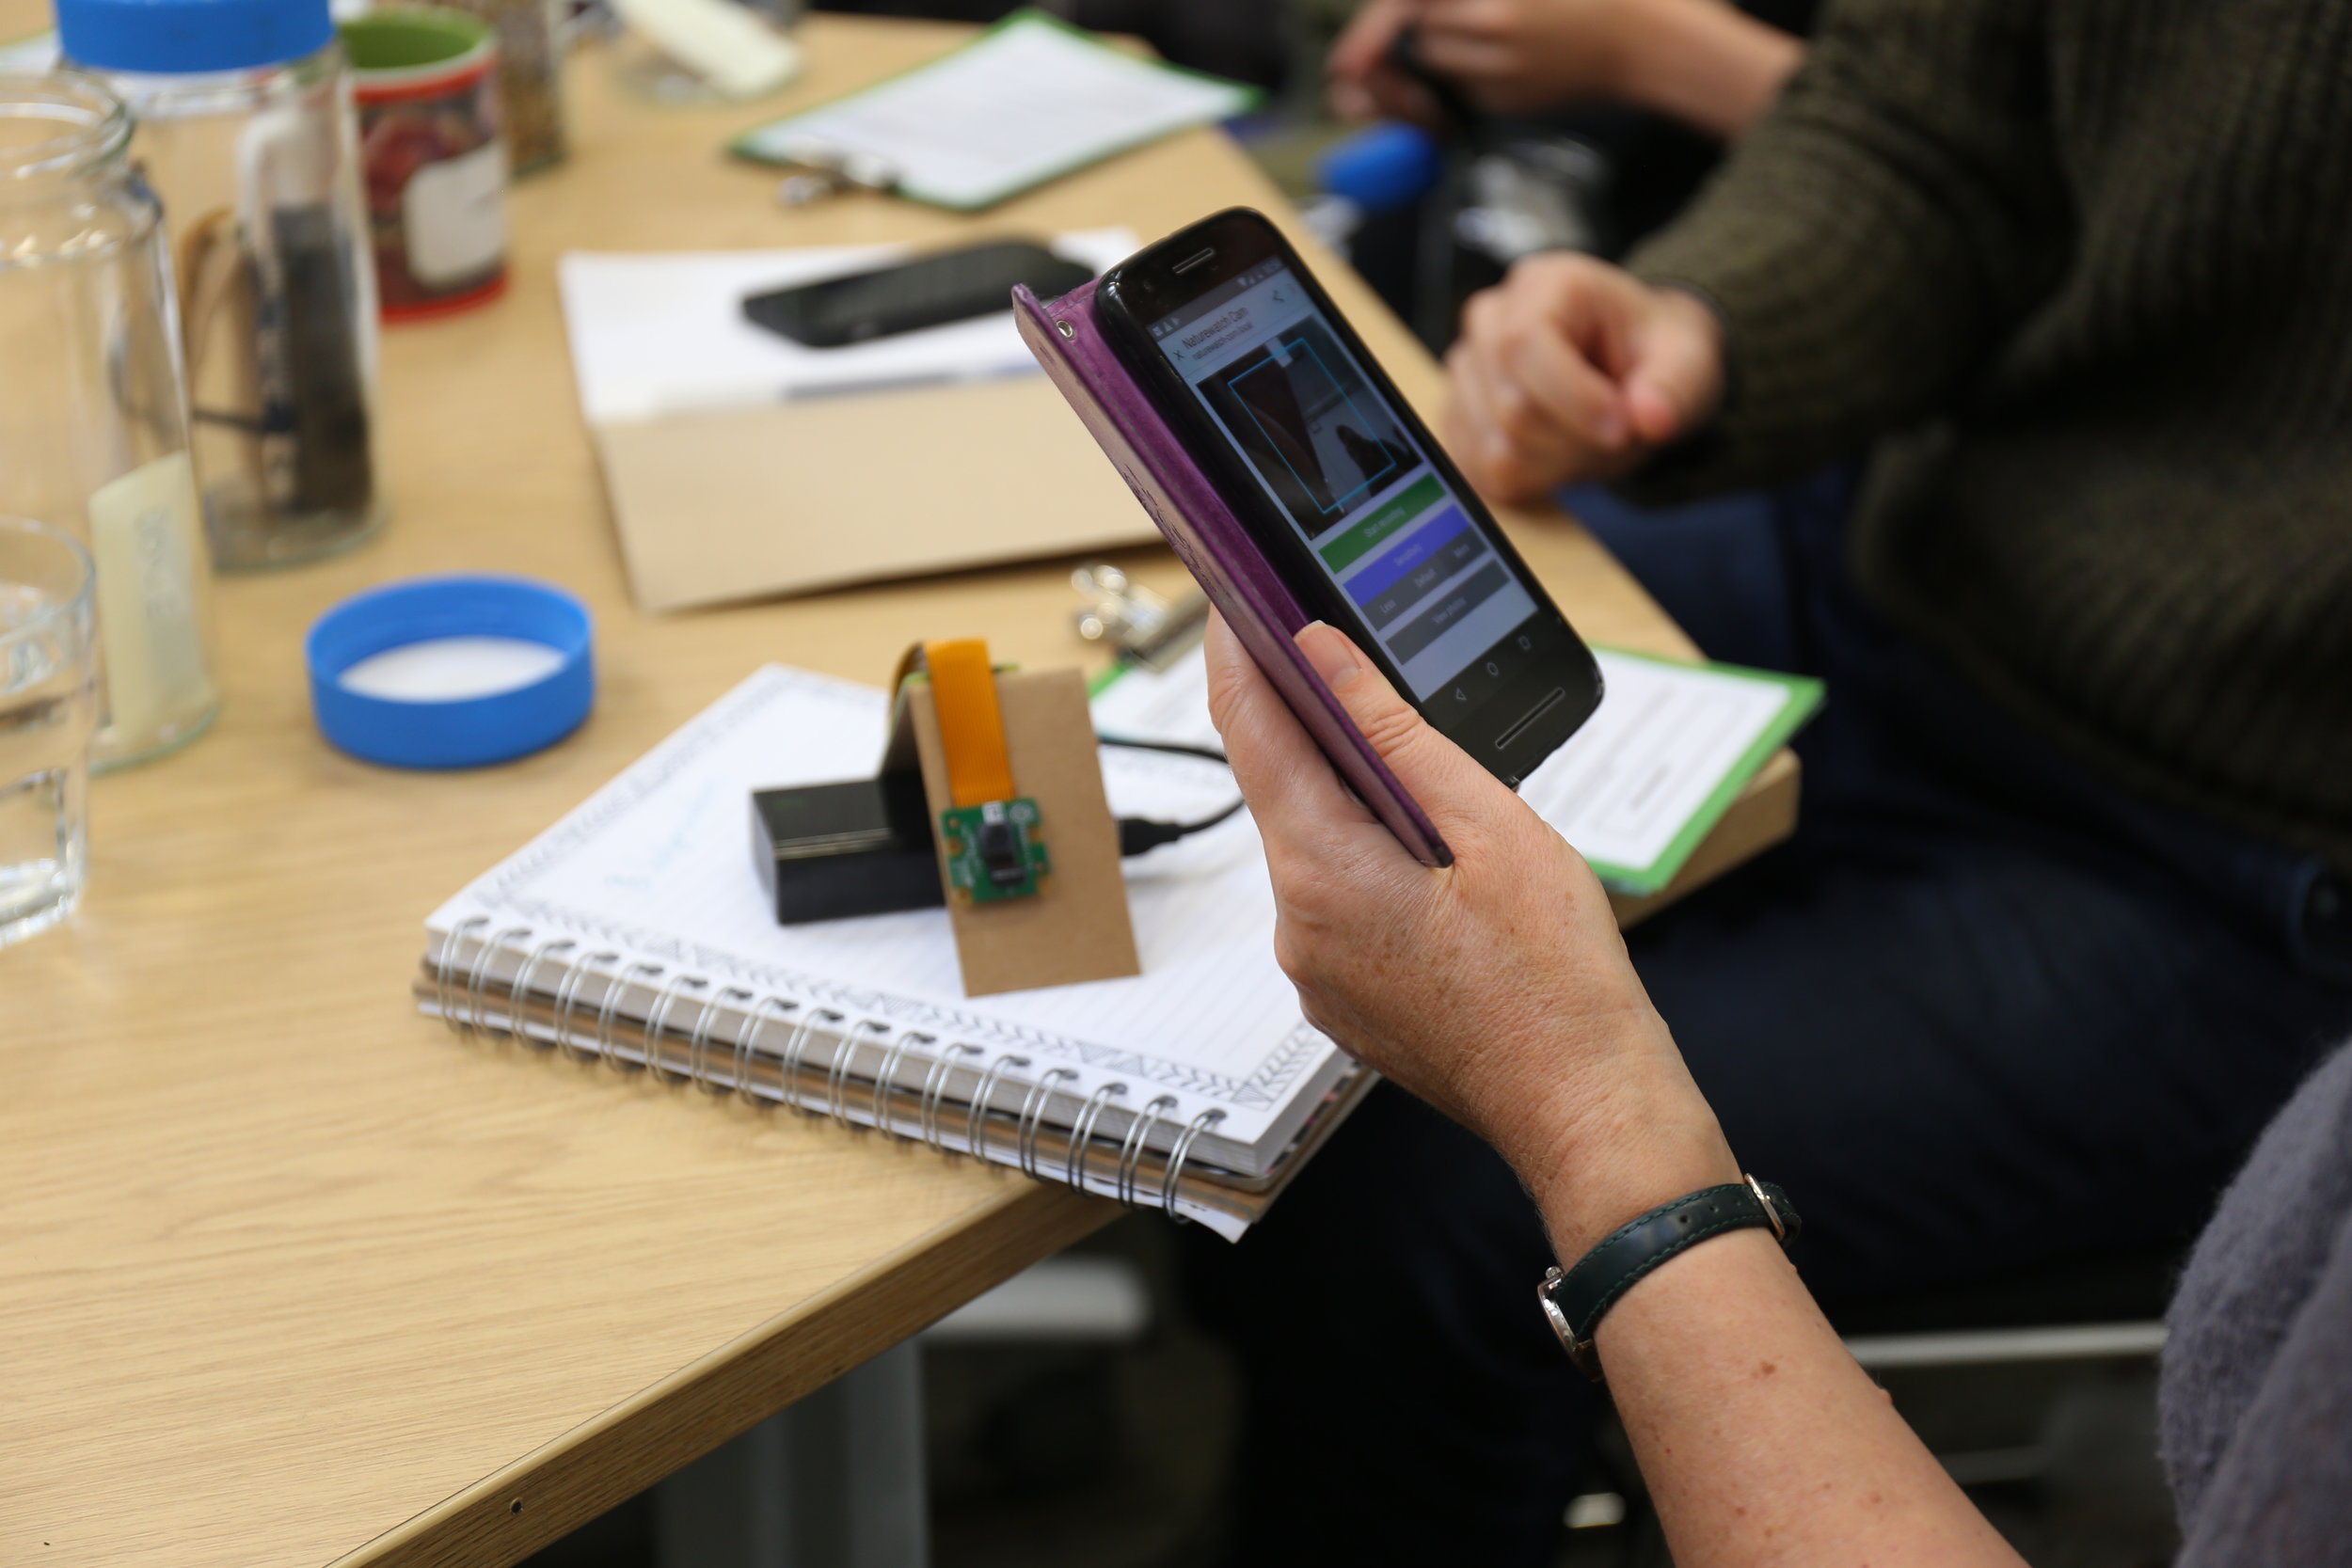
14. Enter the IP address
Once connected with your device, open any internet browser and enter the following IP address into the address bar :
192.168.50.1
You should see the live preview feed from your camera along with the following simple control buttons: Start photo capture, Start video capture, Settings and Gallery.
Find more information about the web interface in 'Using My Naturewatch Camera'.
Make the Camera Housing
My Naturewatch Camera should be protected from the elements by some sort of housing. The possibilities are endless, from ziplock bags to more elaborate constructions. We show you one possibility here, but feel free to improvise!
18. Cut a plastic bottle
The camera works best if the lens is not behind the housing material, no matter how clear that may seem. We drill a hole in the main housing and use a rain cover to protect the lens.
Cut around a the top of a 2 litre plastic bottle with scissors to make a cover (always take care cutting plastic).
19. Drill a hole in a food storage container
Make a hole in the side of a tall food storage box at a height that accommodates the camera lens. The hole should be about 10mm in diameter and is best made by starting with a small drill and progressively working up to the desired size in order to prevent the container from cracking.
If you would like the lens cover to also be detachable, also drill an identically sized hole in the drinks bottle cap. This is best achieved by holding the cap firmly within the jaws of a suitably sized pair of pliers (always take care cutting plastic).
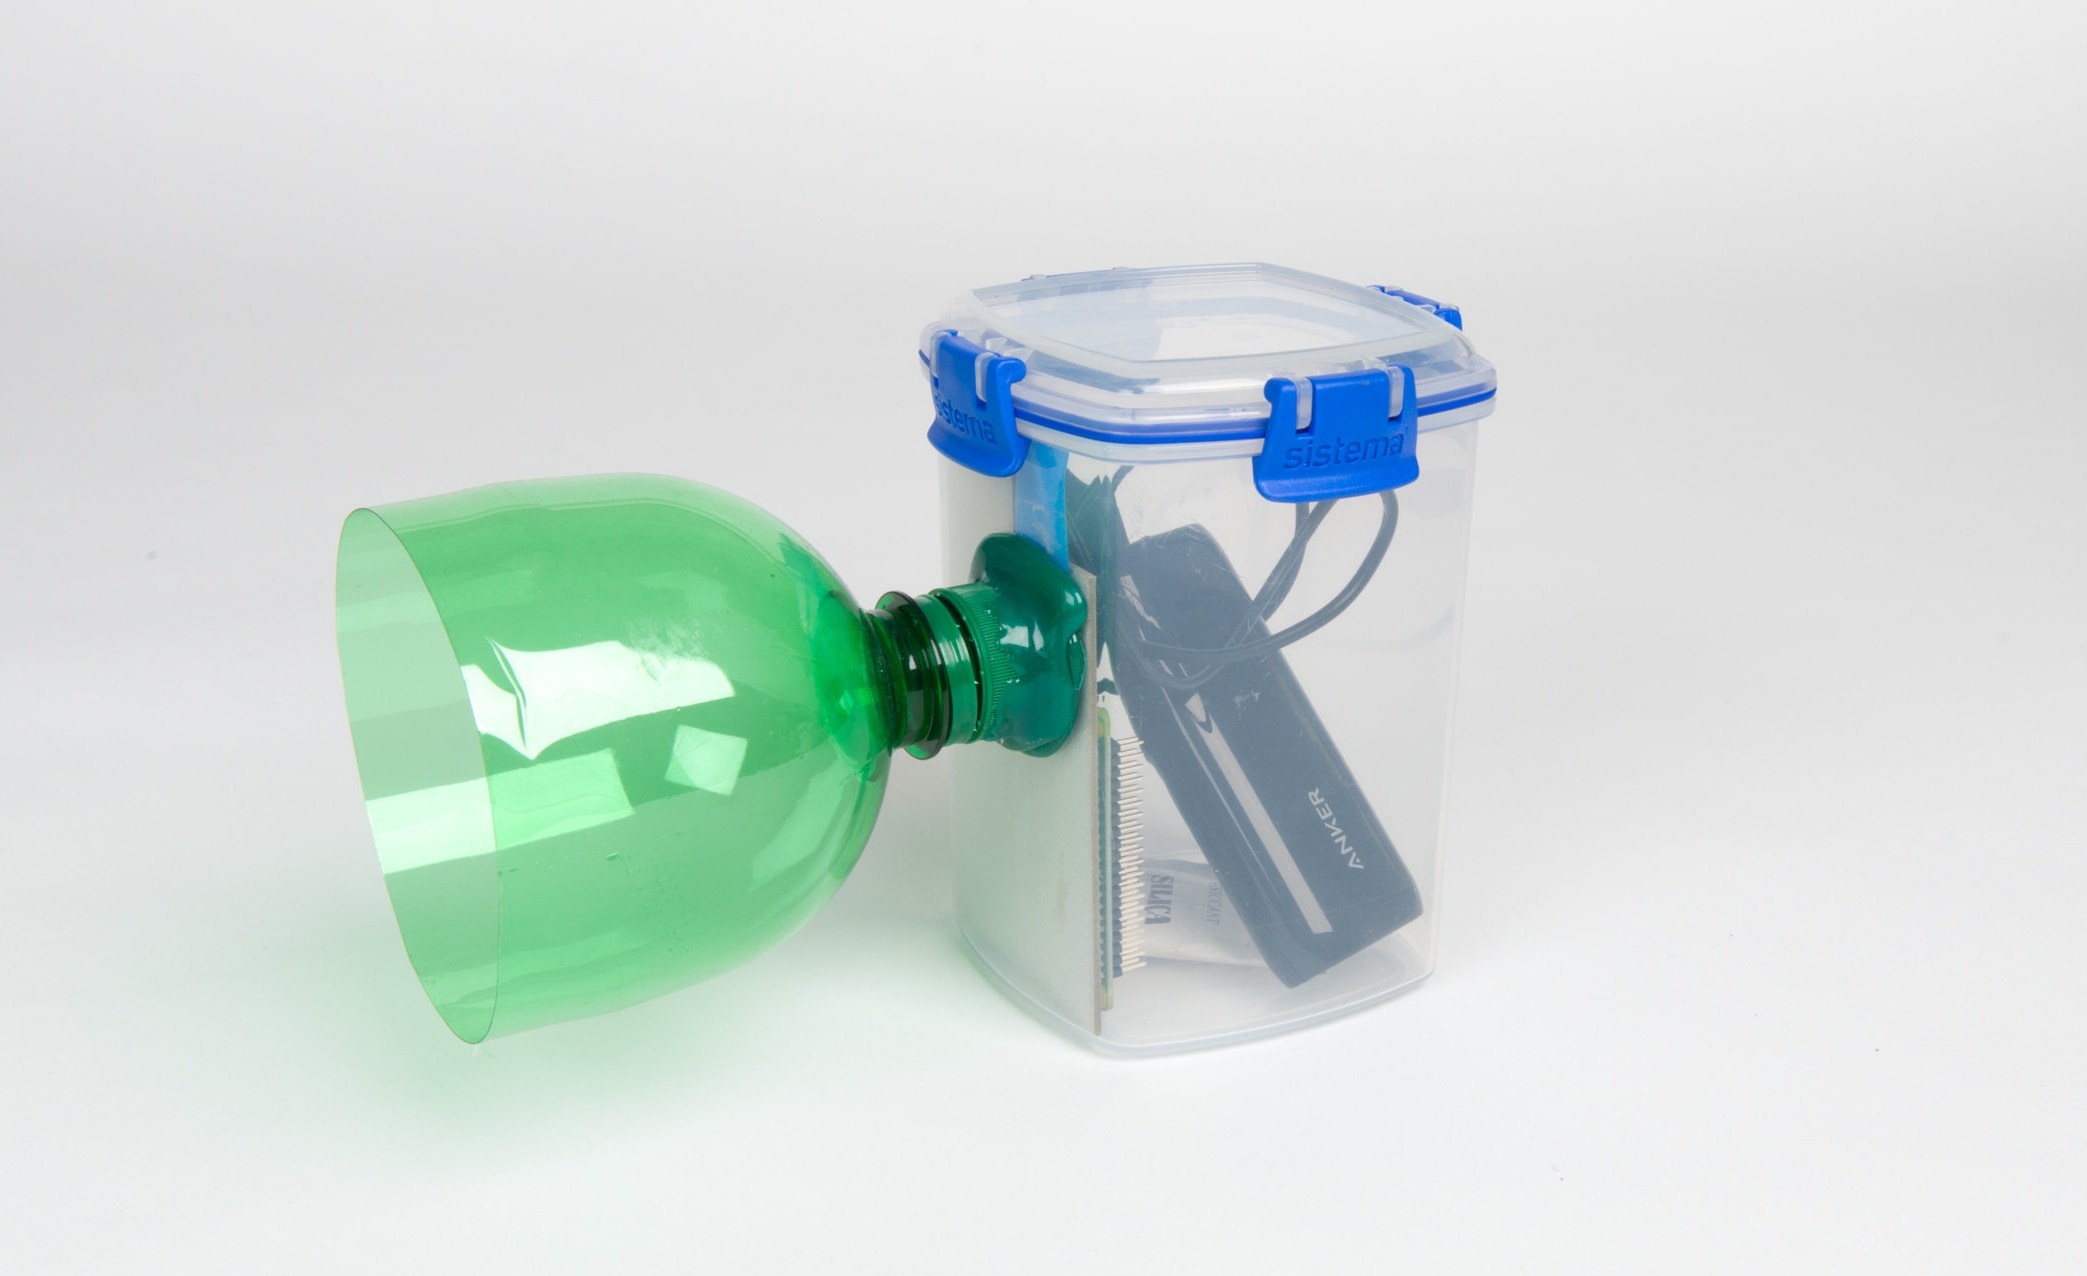
20. Attach the bottle to the food container

Position the drinks bottle cover (with or without the cap) over the opening in the food storage box and make a waterproof seal using a hot glue gun, Sugru or household sealant.
Assemble the Camera
21. Position the electronics inside the container
Tape the cardboard camera mount inside the container, with the lens positioned to look through the hole you drilled. Attach the battery pack.
Tip: a pouch of silica gel will help any absorb moisture that collects in the container.
22. Seal the lid

Seal the lid - you now have a weatherproof My Naturewatch Camera!
Tip: Unplug the battery when you’re not using the camera to save power
23. Using your camera
Please go to the Using Your Camera page for instructions about how to set your camera up.
24. Having problems?
If your camera is not working visit our Troubleshooting page where you will be able to do a check up of your camera and find information on how to fix common problems.